# Project management
# General
In this article you will learn how to create, edit, archive or delete projects. It also explains how to search for projects and how to filter them by certain properties. filter them.
In the main view (Home) you will find all active projects that are assigned to you as a customer/client.
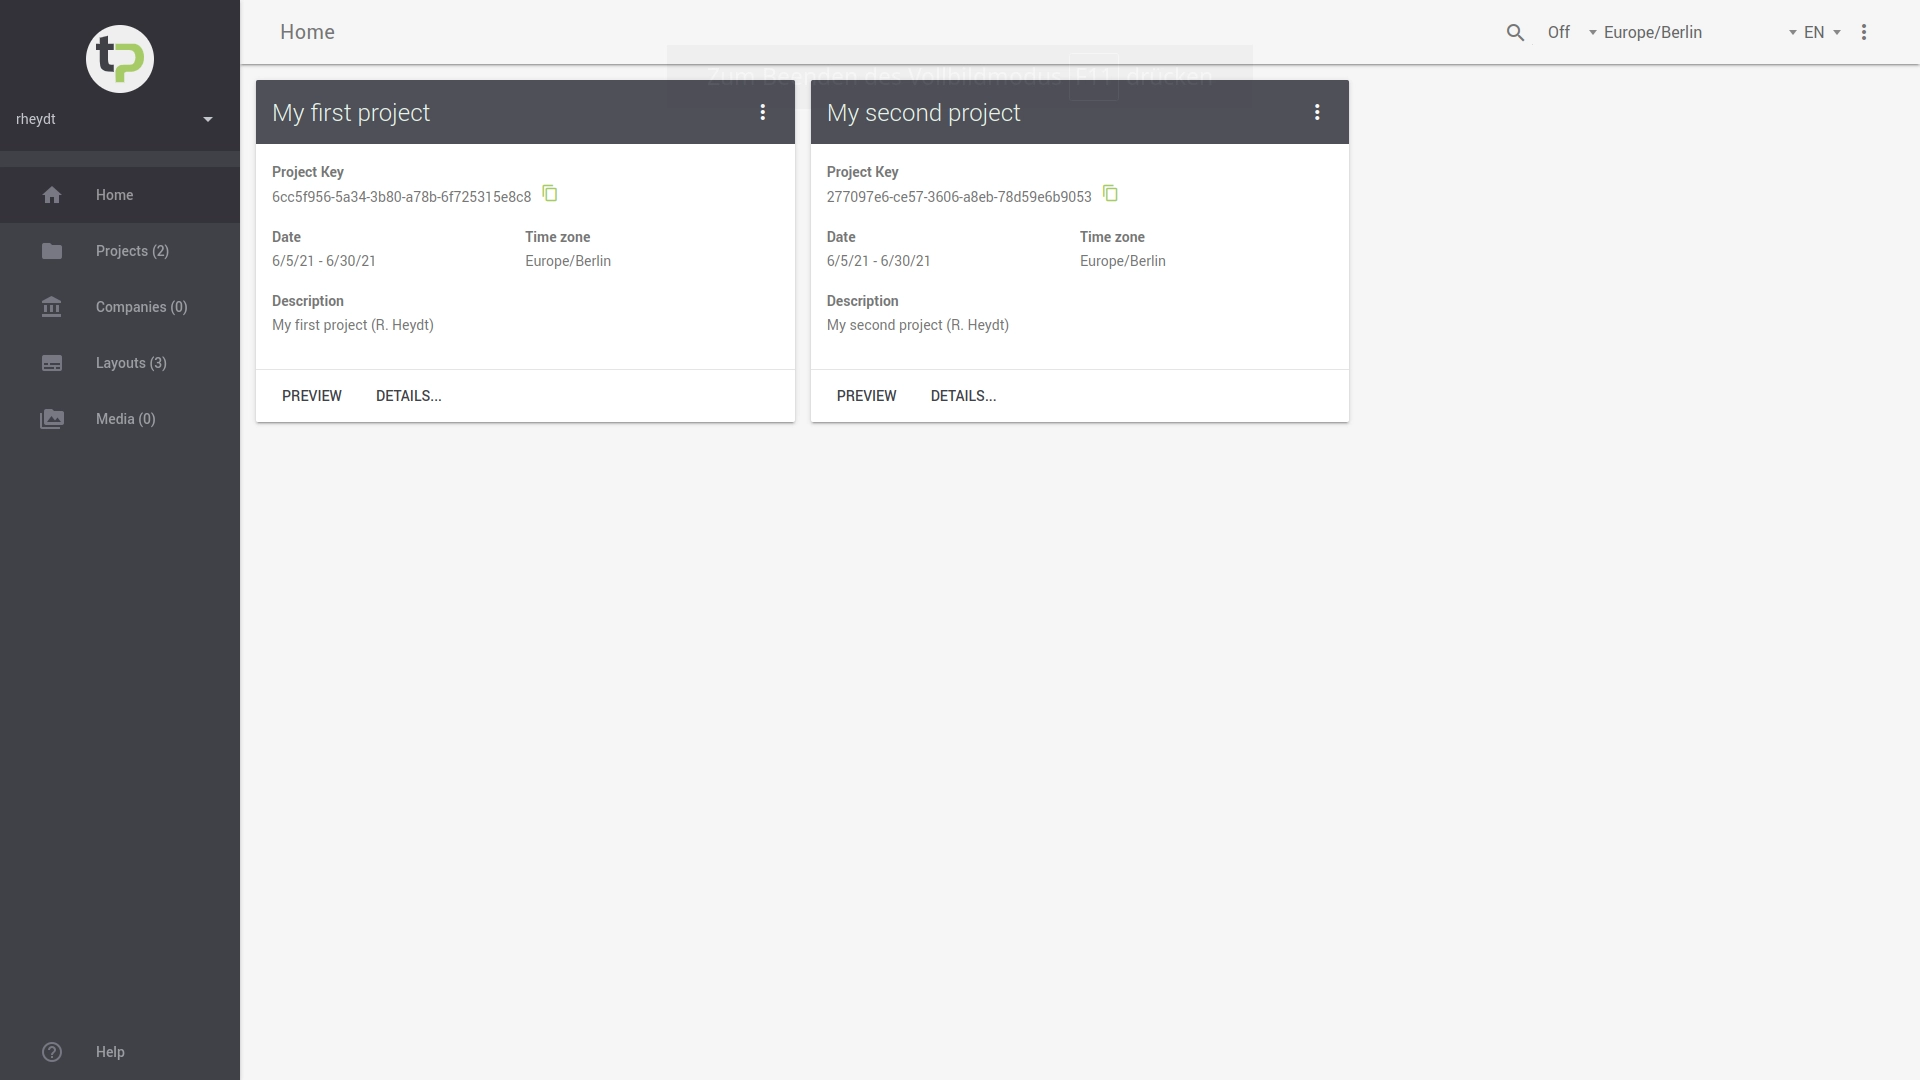
The unique project key is of special importance, because it is linked to the access to the presentation devices. is linked to it. On this overview you find for each project also the times, from when until when these are planned and active, as well as the time zone in which they take place.
By clicking on DETAILS... you get to a view where the further data and the specific properties of a
project can be made.
# Your projects
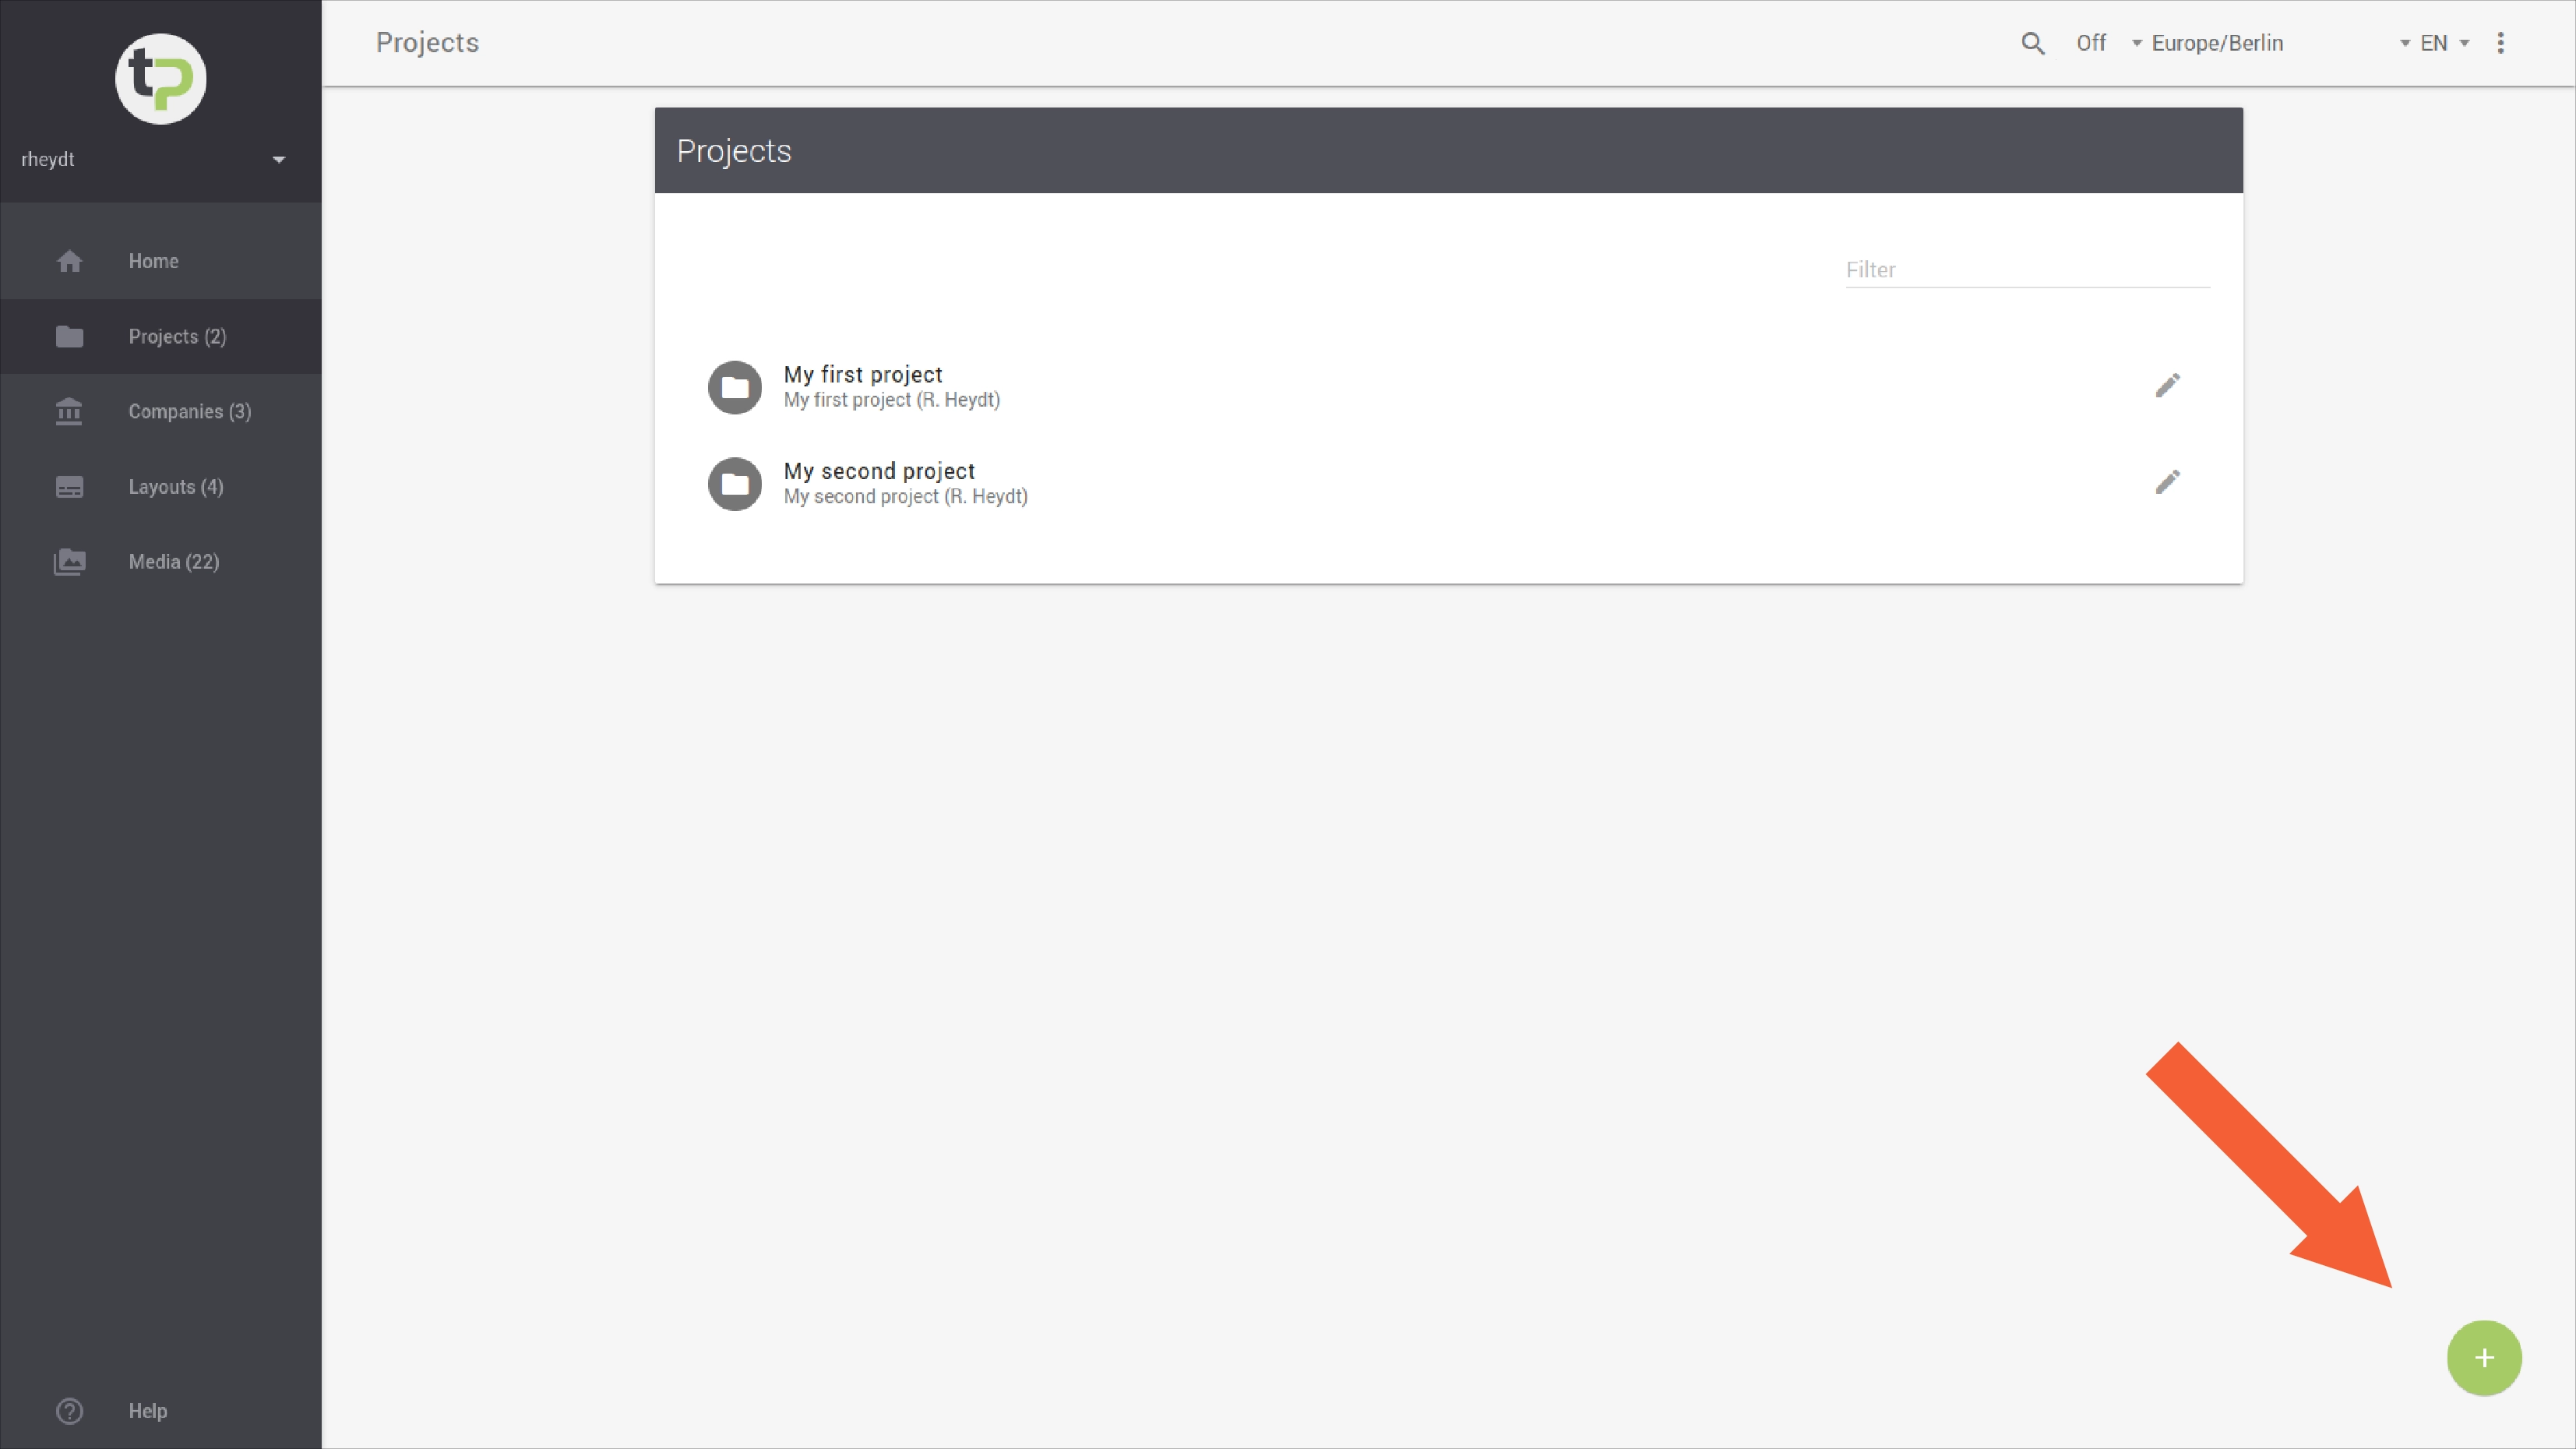
In the view Projects you will find a list with all planned, past or "archived" projects.
# Search & filter
In the Filter section you can specifically limit the set of displayed projects. For this purpose you can use the
name of a project. The list is automatically filtered according to your entries.
Upper and lower case letters are not considered.
The hits are sorted alphabetically descending by the project name.
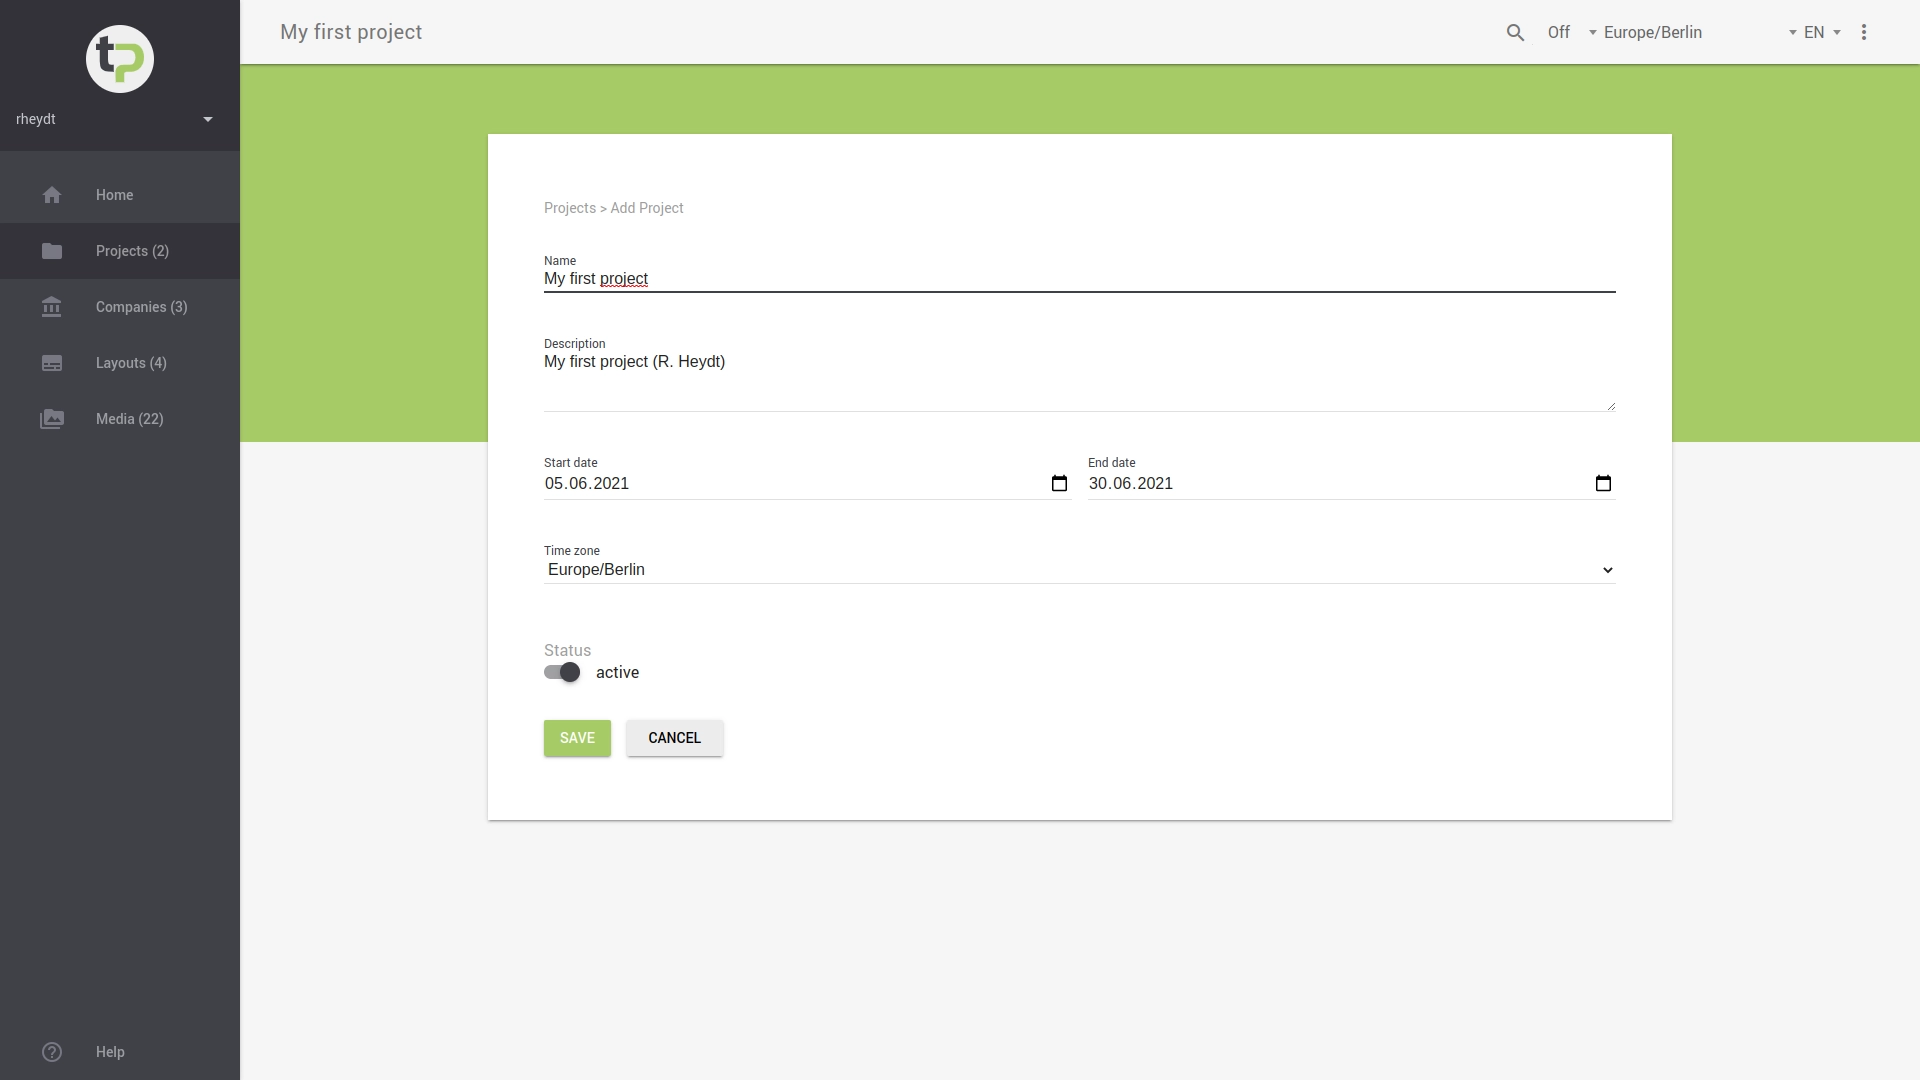
# Define a new project
You can add a new project by clicking on the + button in the bottom right corner. The following view will open:
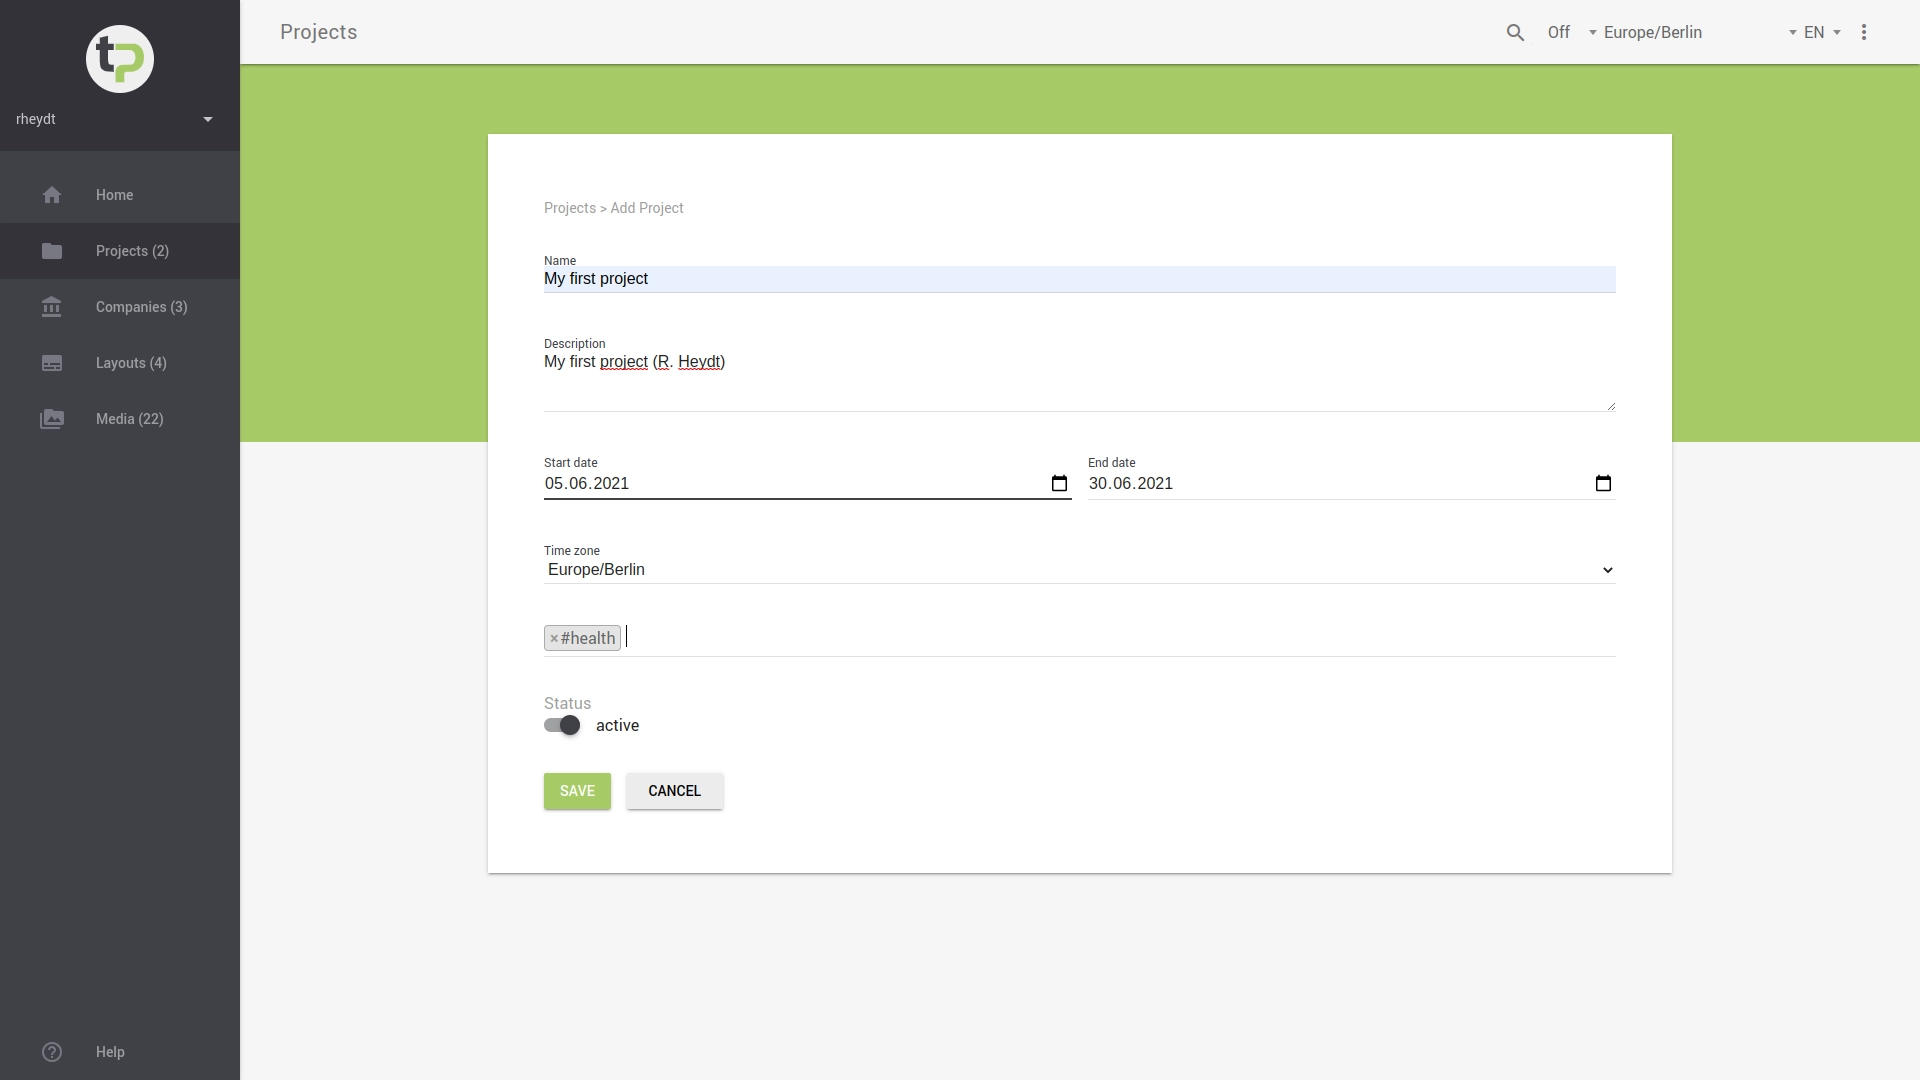
# Set basic properties
For each new project you can set the properties
- name (as unique and short as possible).
- description (additional notes or information).
- Start date.
- End date.
- Time zone, e.g.
Europe/Berlin - Tracked terms (for social media purposes), e.g.
#Berlin2021.
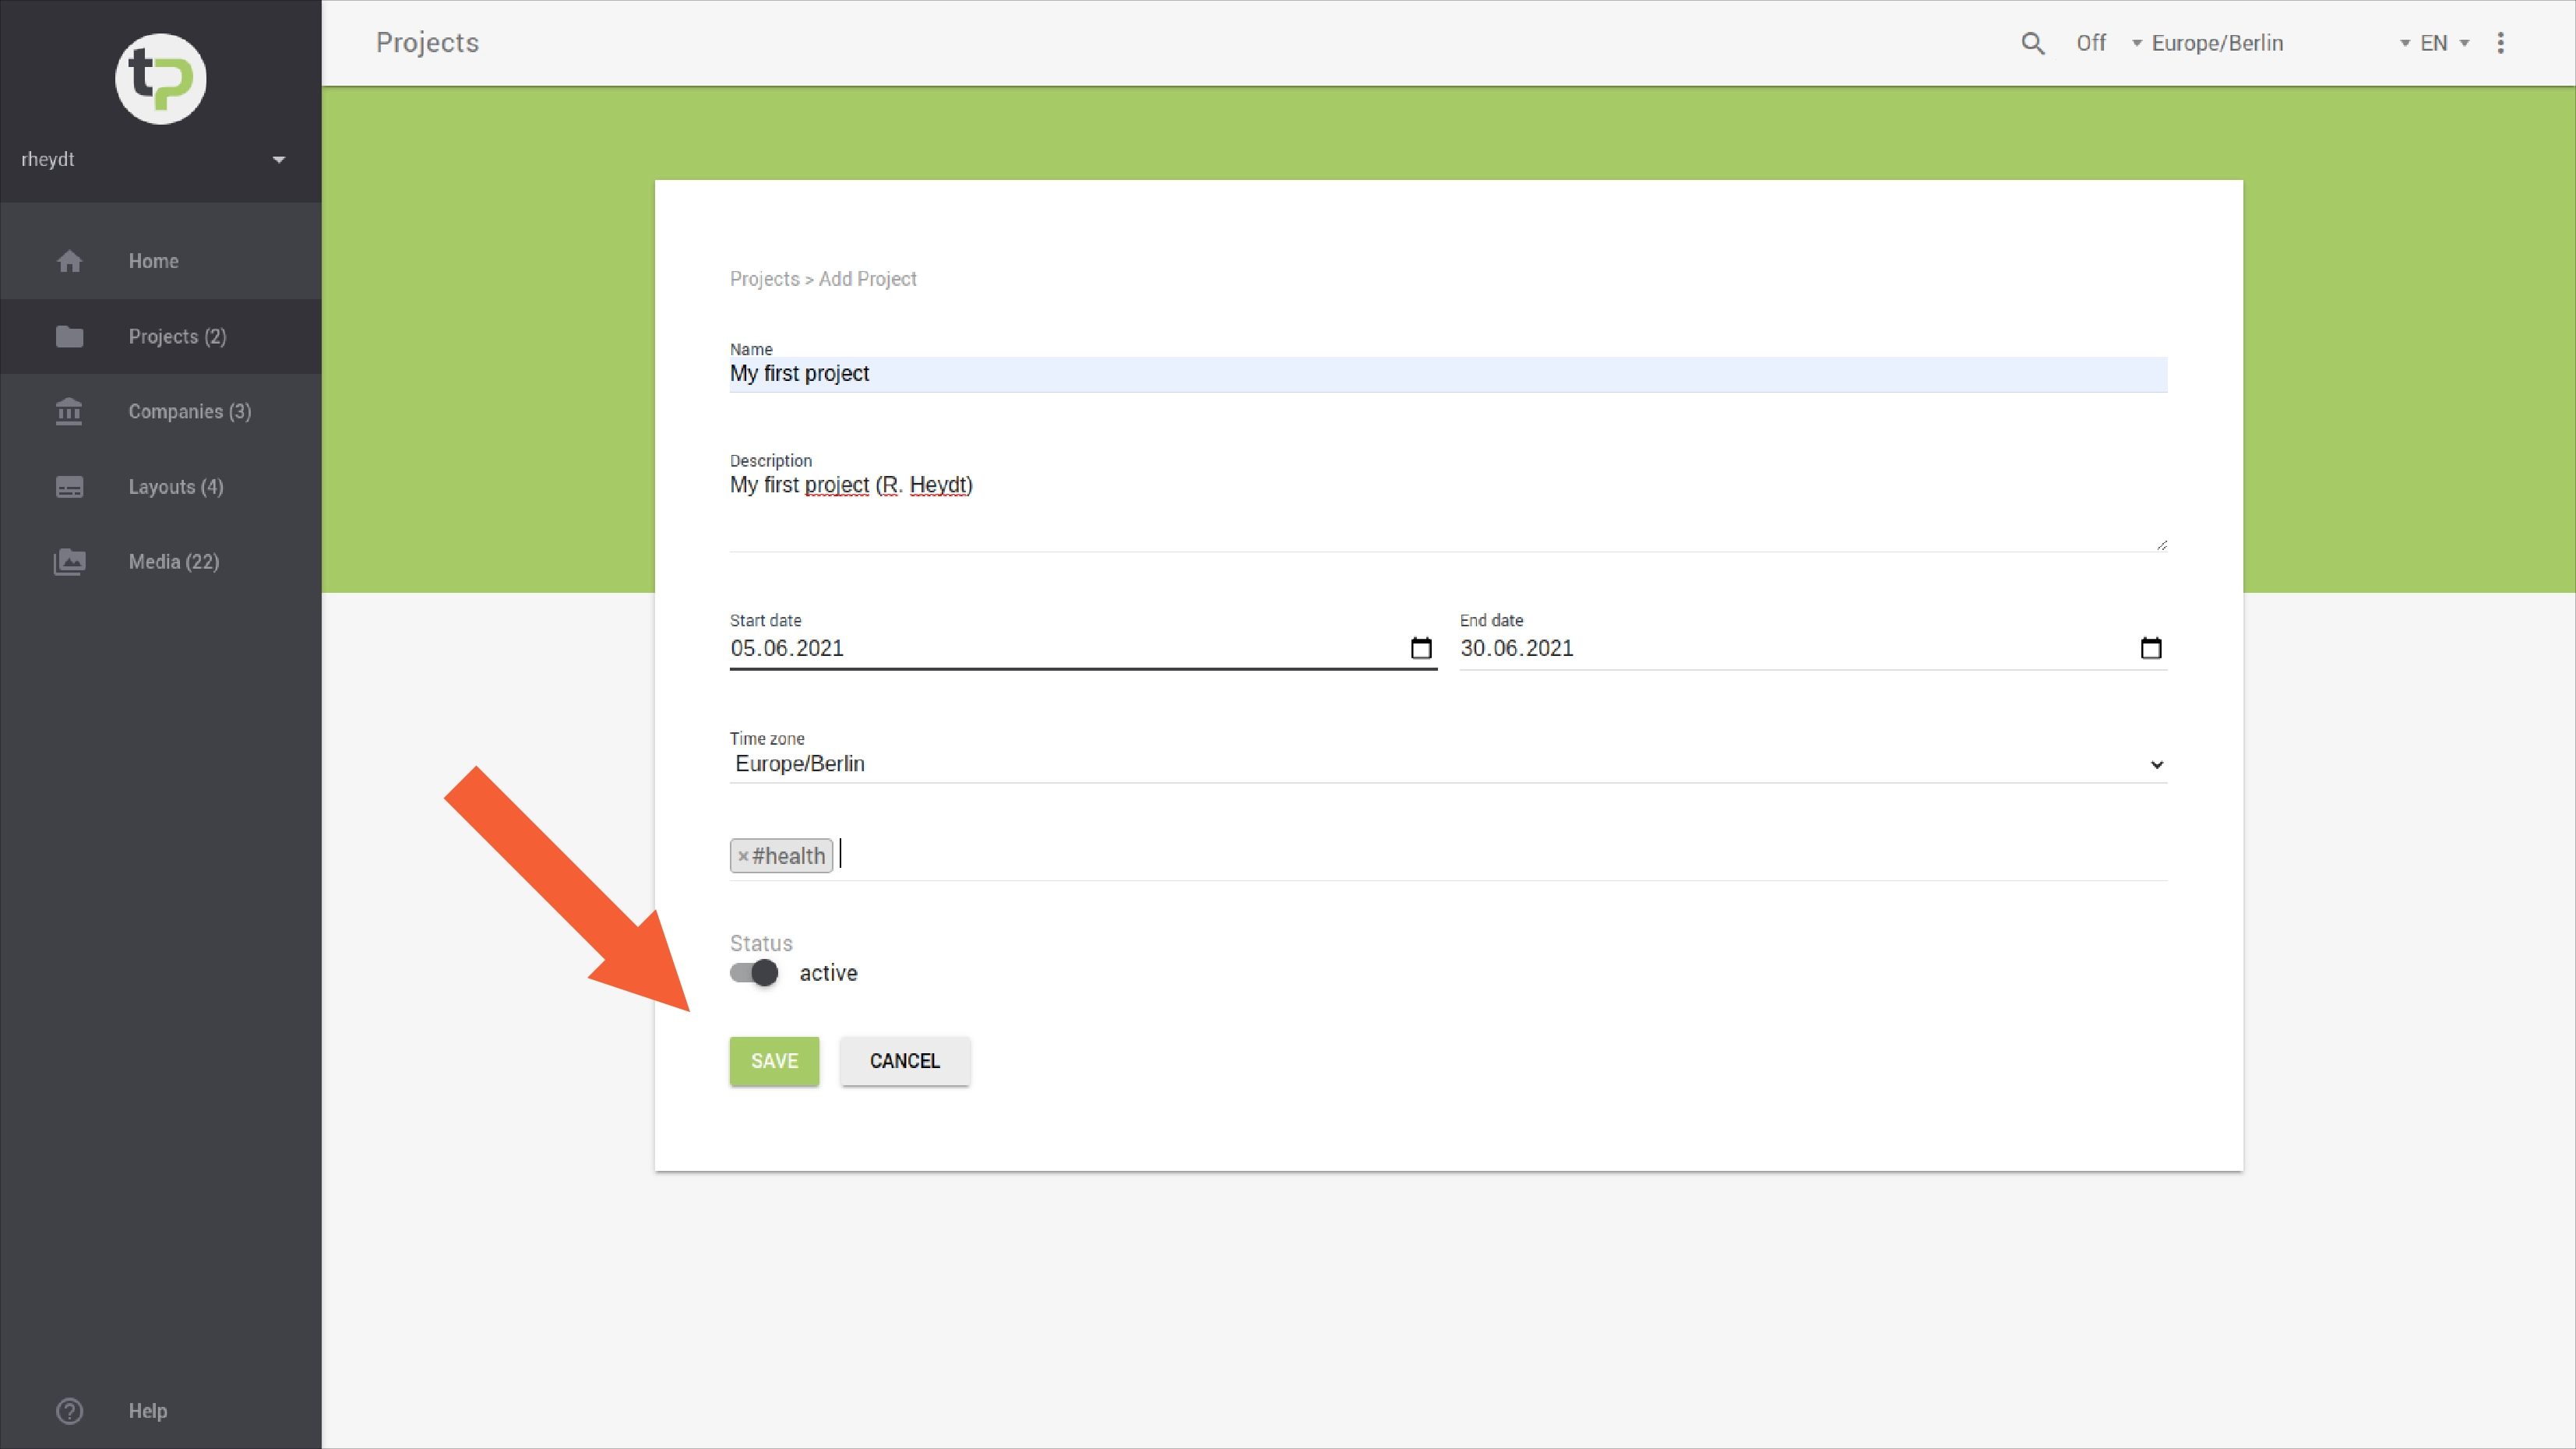
With the button STORE the new project is finally created. The button only becomes active as soon as all required entries have been made.
By clicking on the CANCEL button, all entries are discarded and you return to the list of your projects.
# Set time period
When defining a project period, you should make sure that the end date is after the start date.
Tip:
For one-day events or projects, you can define the end date to be the exact same day as the start date.
# Archive project
When creating or editing a project, you can use the Status button to define that a project becomes active and thus visible.
This can be useful if you no longer want to have past projects in front of you, but still want to keep the old data or layouts from these projects.
from these projects.
Tip:
- By default, projects are automatically
activewhen created. Therefore do not change the status at this time. - If you set a project to not active, it disappears from the main view (
Home) and can only be found in the project list. - You can set past projects to
activeagain at any time, if you need something from them again or if you want to compare them with current projects.
# Edit
To edit an existing project, press in the projects view.
The view for editing a project opens again.
You can set here the
- Start date ,
- end date , or the
- time zone, e.g. to
Europe/Athens.
change.
With the button Save the changes you have made will be applied.
Tip:
- If you want to change the tracked terms afterwards, you can only adjust this via the social media configuration of a project.
- To do this, navigate from the
Homeview to a project context via theDETAILS...button. There you will find in the navigation bar you will find the viewSocial-Media. From there select the sub-viewConfiguration. You can learn more in this KB article.
# Delete
To delete an existing project, you must first switch to the Home view.
Then press on the tile of the project you want to delete.
The context action Delete will appear here.

Press Delete to remove the project and all associated settings and data from the system.
To complete this process, press CONFIRM in the following dialog.
Otherwise, you can cancel the deletion process by clicking the CLOSE button.