# Internet connection
In this article you will learn how to set or make adjustments to the Internet connection of the display connected to the pre-configured mini-PC.
# Establishing a WLAN connection
During the initial setup, it is necessary that you configure the WLAN connection of the device. After starting the device, a white page is initially displayed if no Internet connection is available (yet). To adapt the Mini PC to your circumstances, proceed as follows:
- Exit the white page by pressing the
ALTandF4keys on your keyboard simultaneously. - You will be presented with a graphical interface with a black background. Click here on the marked symbol, cf. the following picture:

- A list of available and visible WLANs is displayed. Choose the WLAN that suits you best and connect to it by left-clicking.

- If your WLAN is protected by a password, you will be prompted to enter it. Enter your WLAN password and press
Connect.
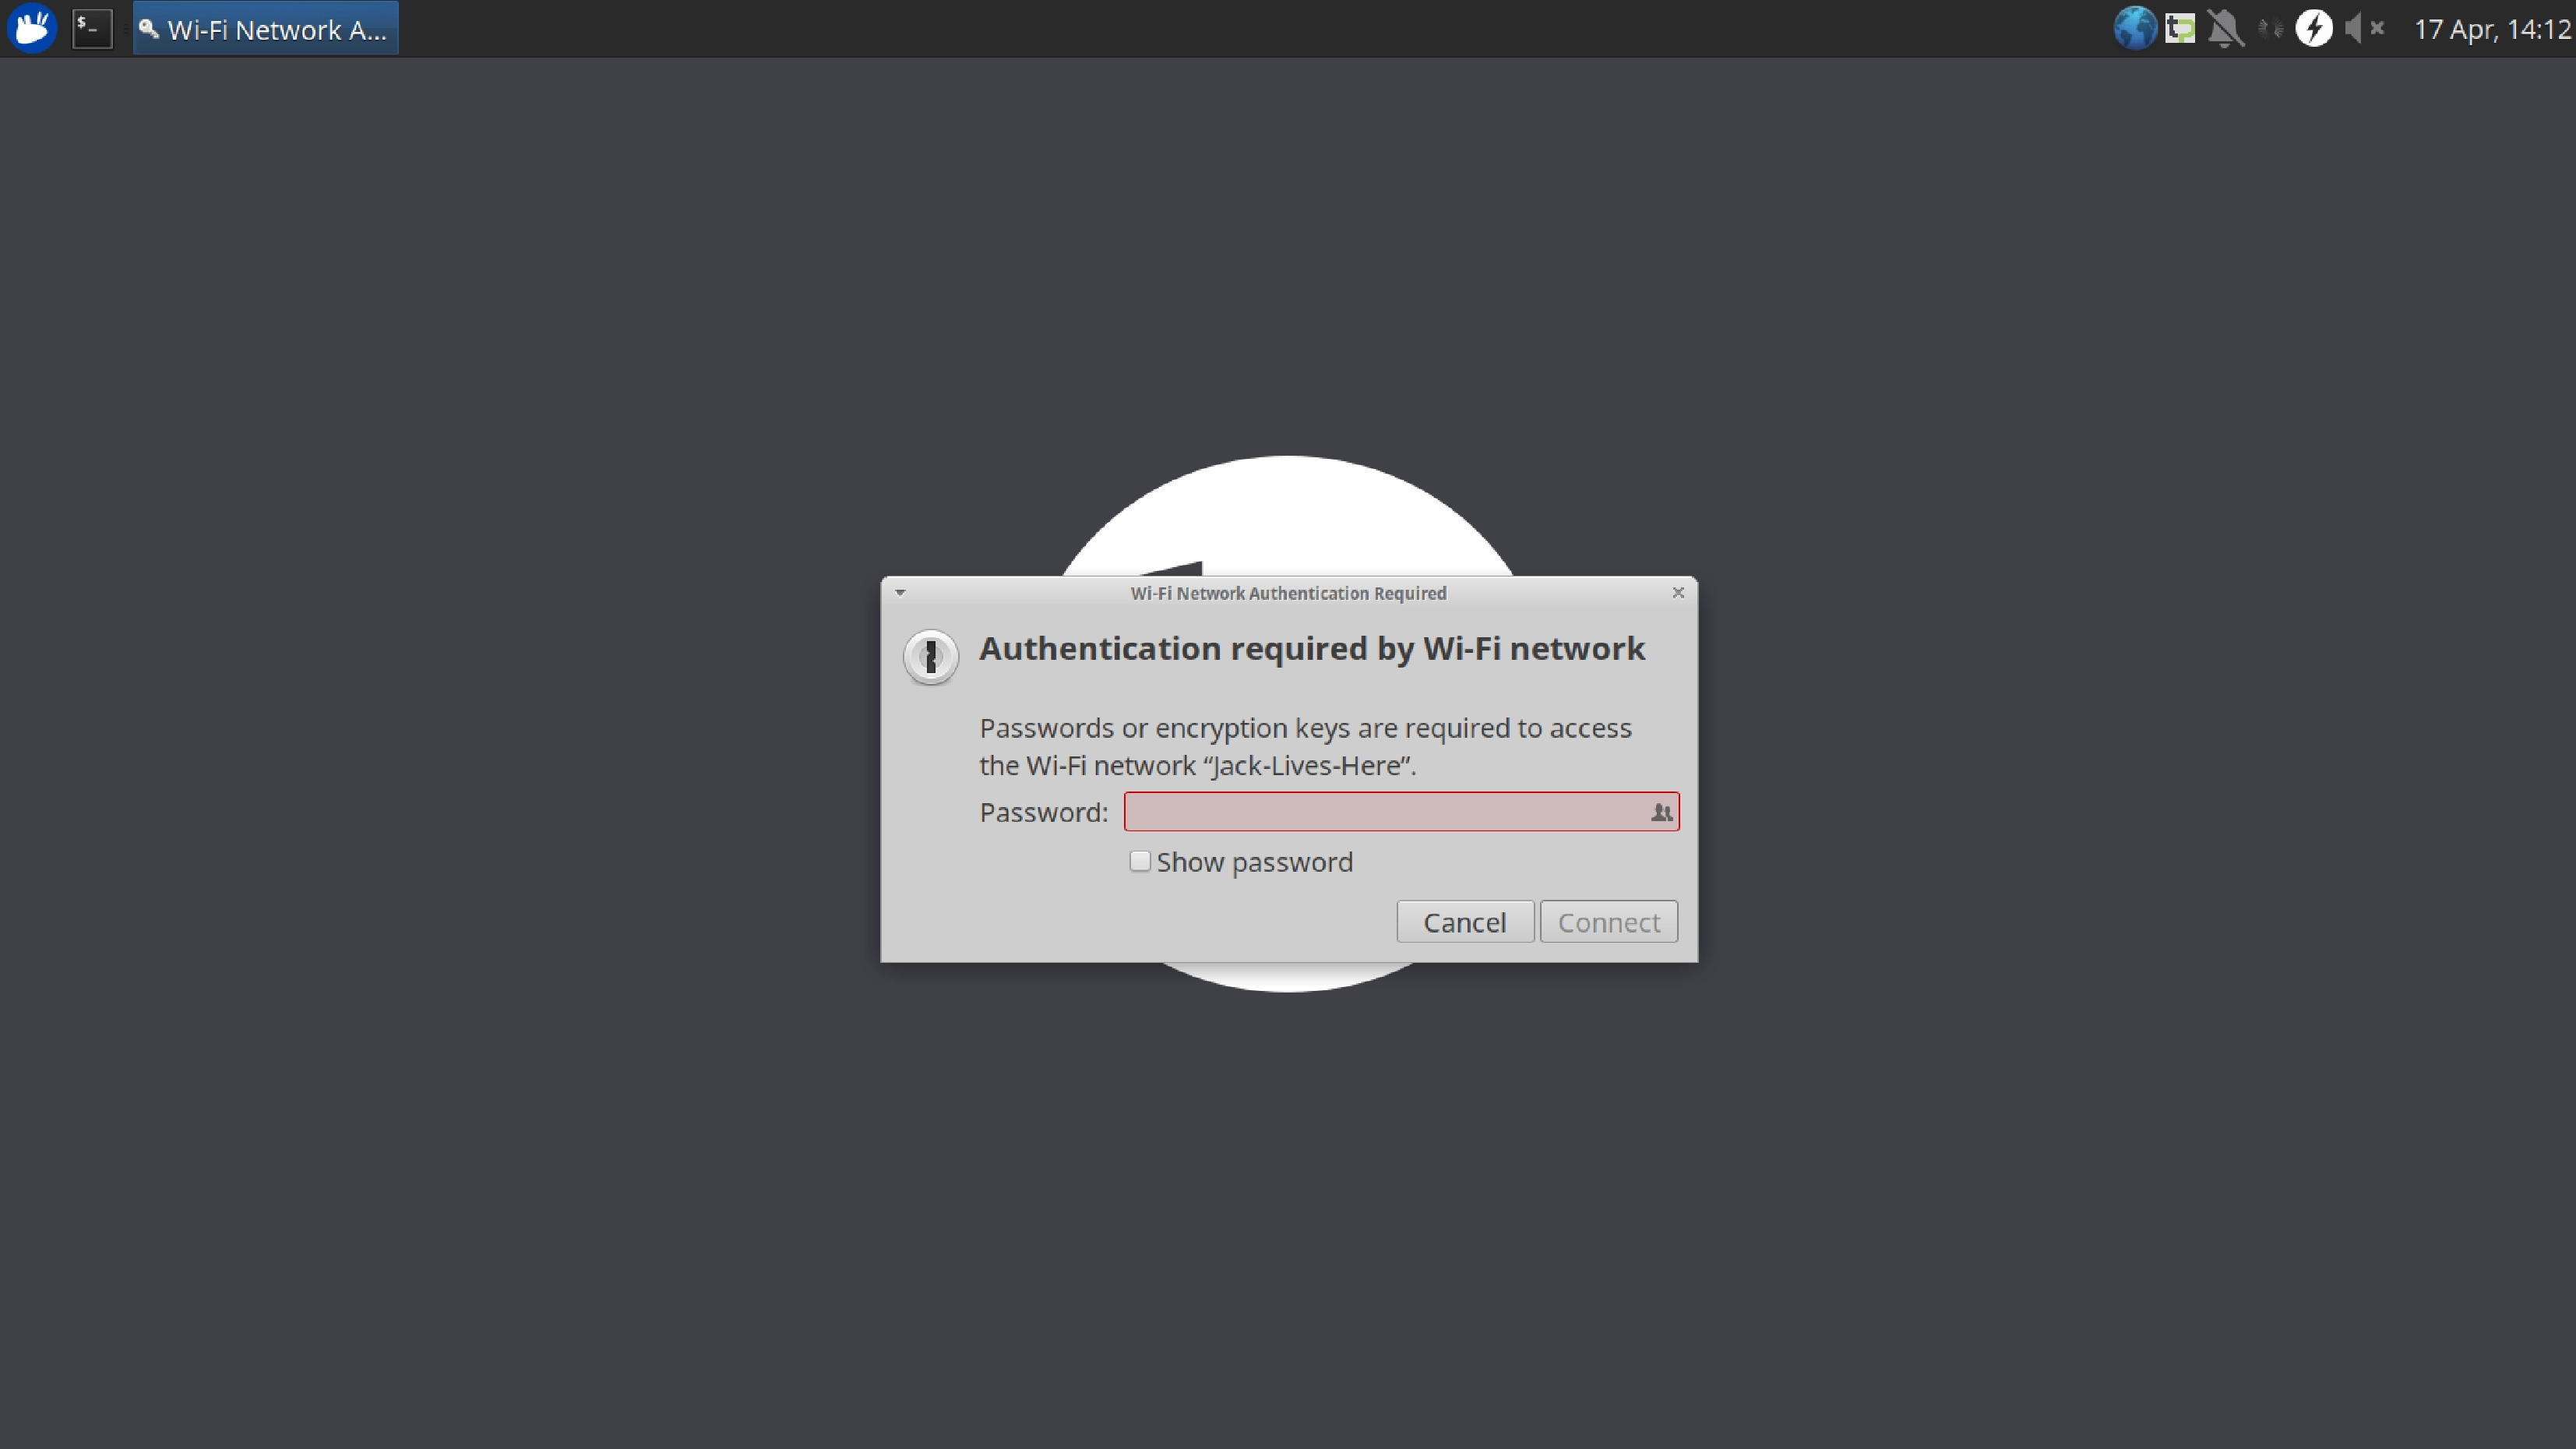
- Your device should now connect to your chosen WLAN.
- After successfully establishing Internet connectivity, you can restart the client application. To do so, click on the highlighted icon.

- If the previous steps are completed successfully, the client application will open and display the layout you configured.
- If a white page is still displayed, first try to trigger the reload of the client application by pressing the
F5key. - If the blank page does not resolve, your Internet connection via the previously selected WLAN has not been established correctly or has been disrupted. Please check the previous steps or contact your local administrator in this case.
Important notes:
- Under certain circumstances, the MAC address of the device must first be released by your local administrator in a Firewall, so that an address assignment via DHCP can take place in the WLAN.
- The MAC address is clearly visible on the back of our mini PCs.
# Establishing a wired Internet connection
# Static connection
During the initial setup, it is necessary that you configure the wired Internet connection of the device. After starting the device, a white page is initially displayed if no Internet connection is available (yet). To adapt the Mini PC to your circumstances, proceed as follows:
- Exit the white page by pressing the
ALTandF4keys on your keyboard simultaneously. - You will be presented with a graphical interface with a black background. Click here on the marked symbol, cf. the following picture:
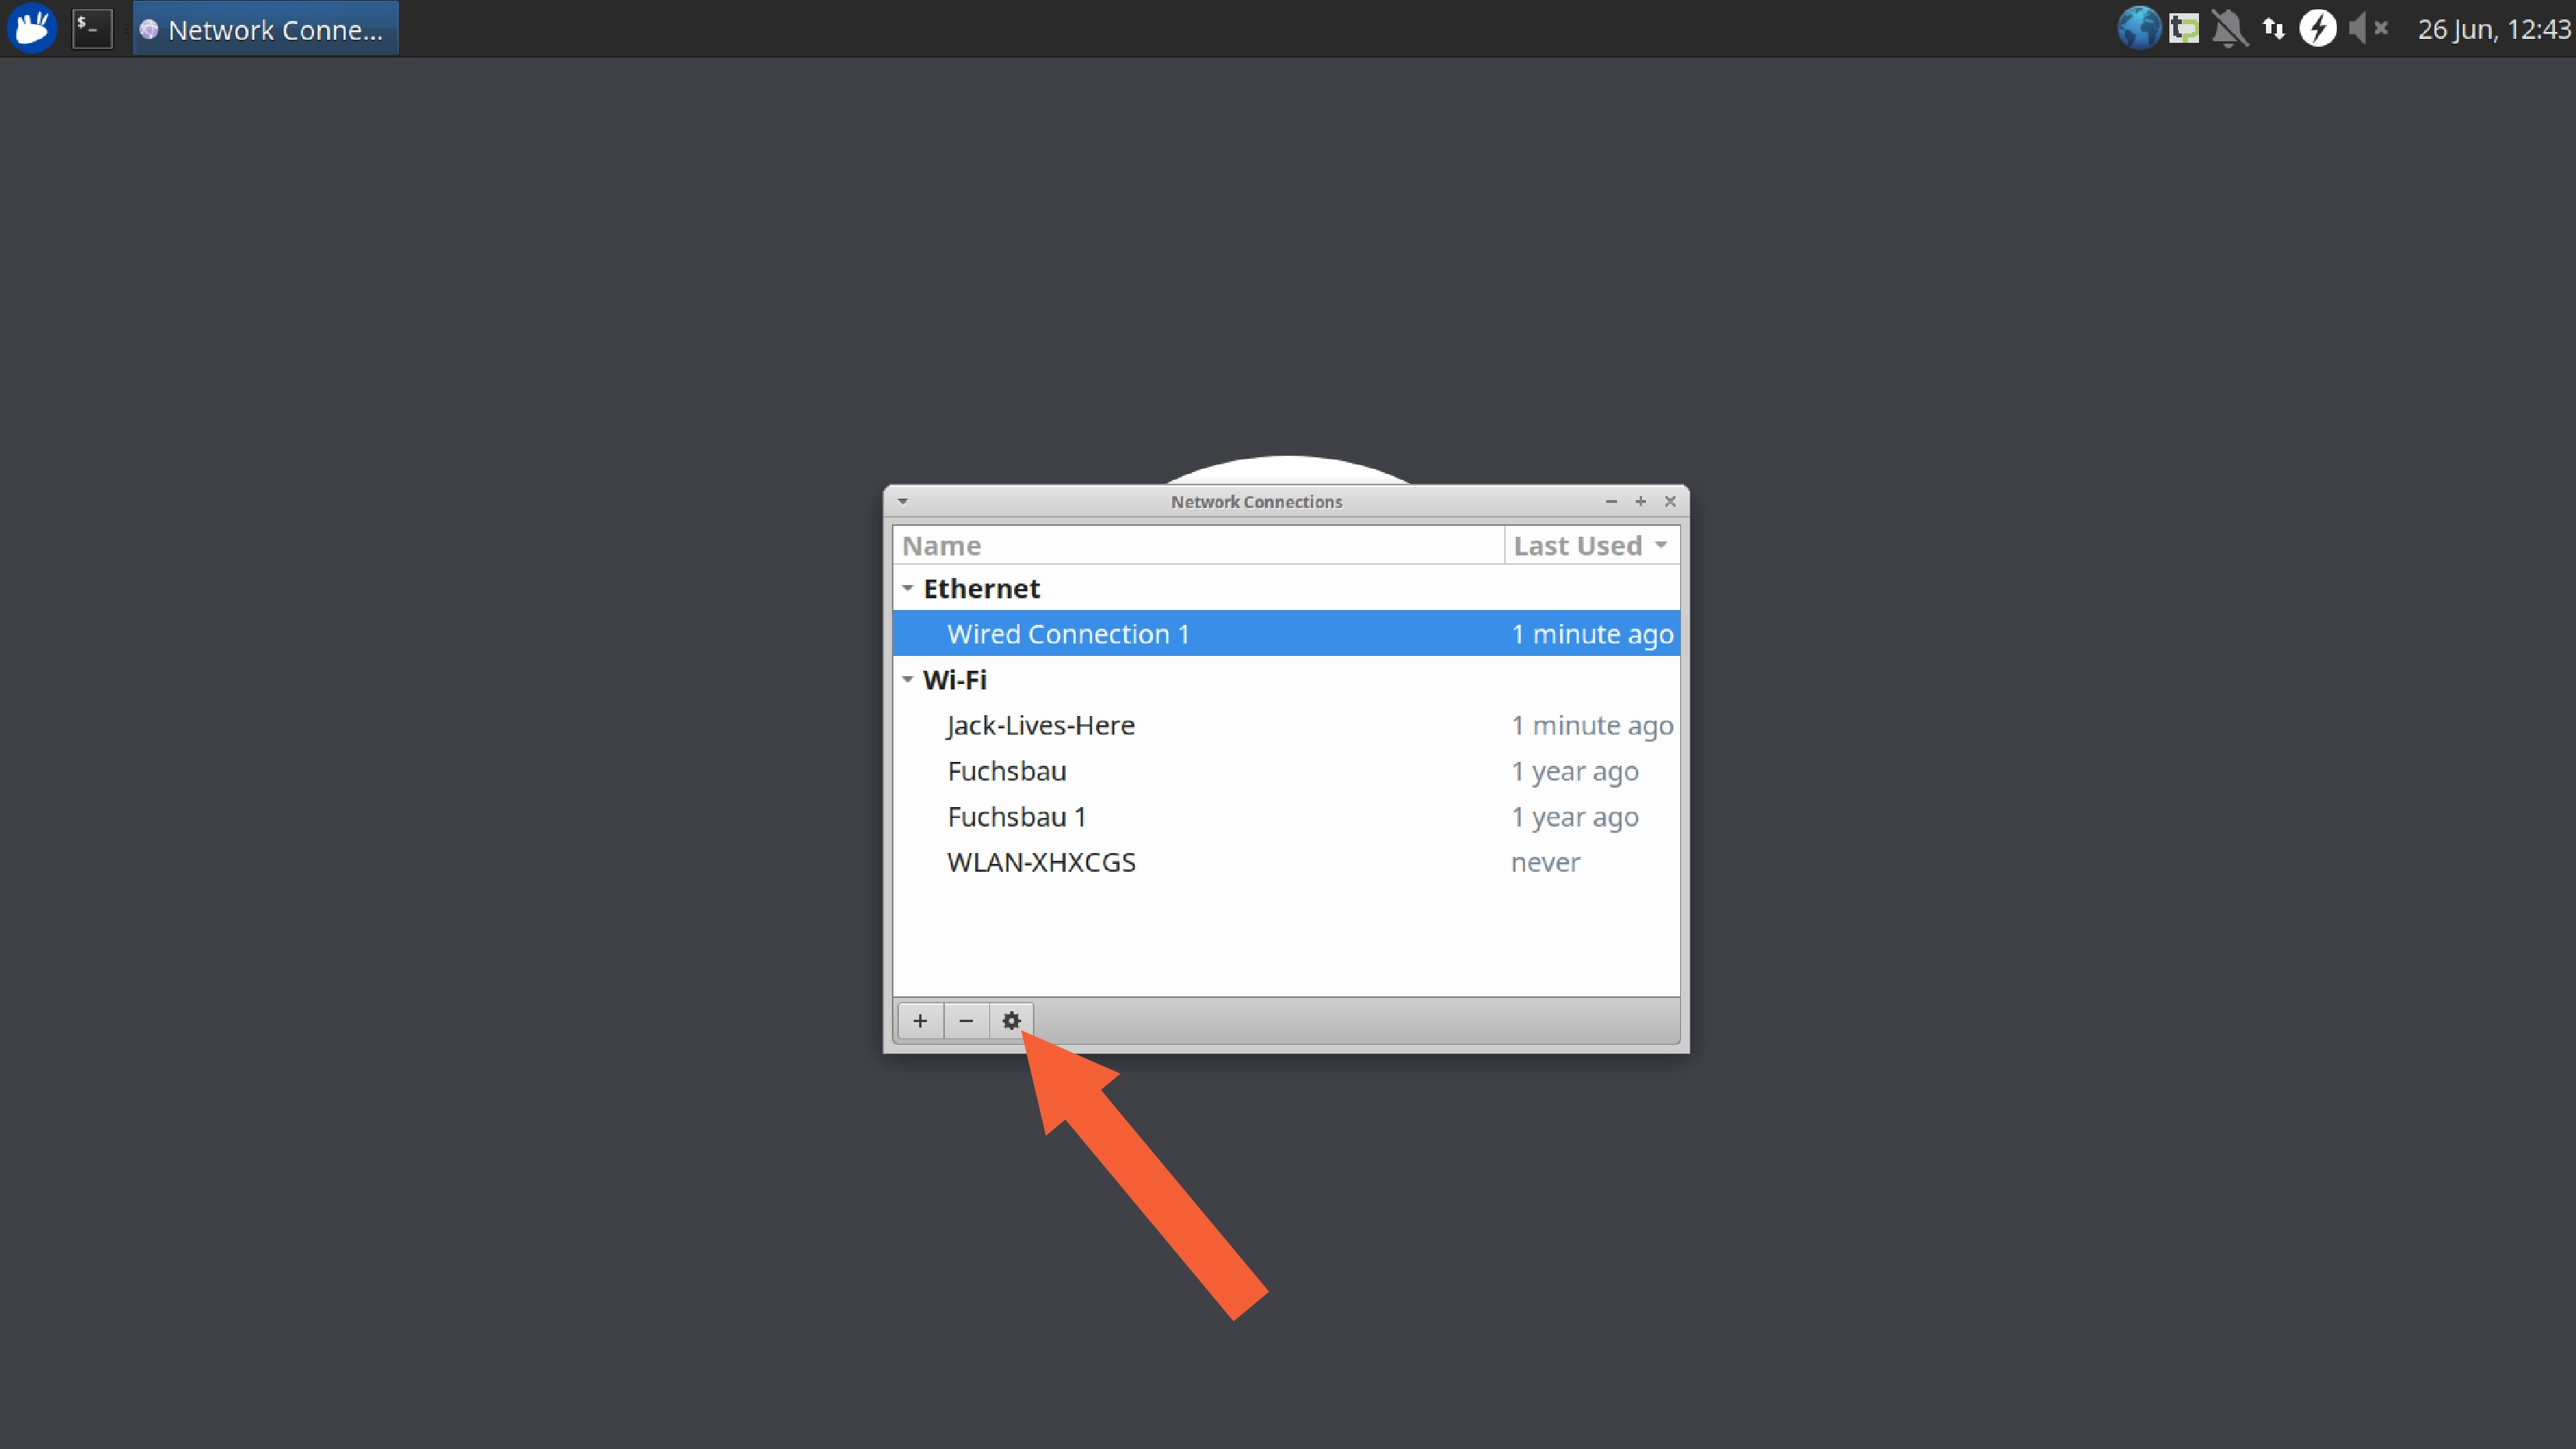
- Select
Edit Connections.

- Select
Wired connection 1.
- Select the tab
IPv4 Settings.

- Select
Manualin theMethodfield and configure your network settings according to the information you received from your local administrator.

- Then press
Save. First disable your wired network. Then activate it again.

- Then check the network configuration by clicking on
Connection Information. The configuration displayed there should now match the configuration you expect.
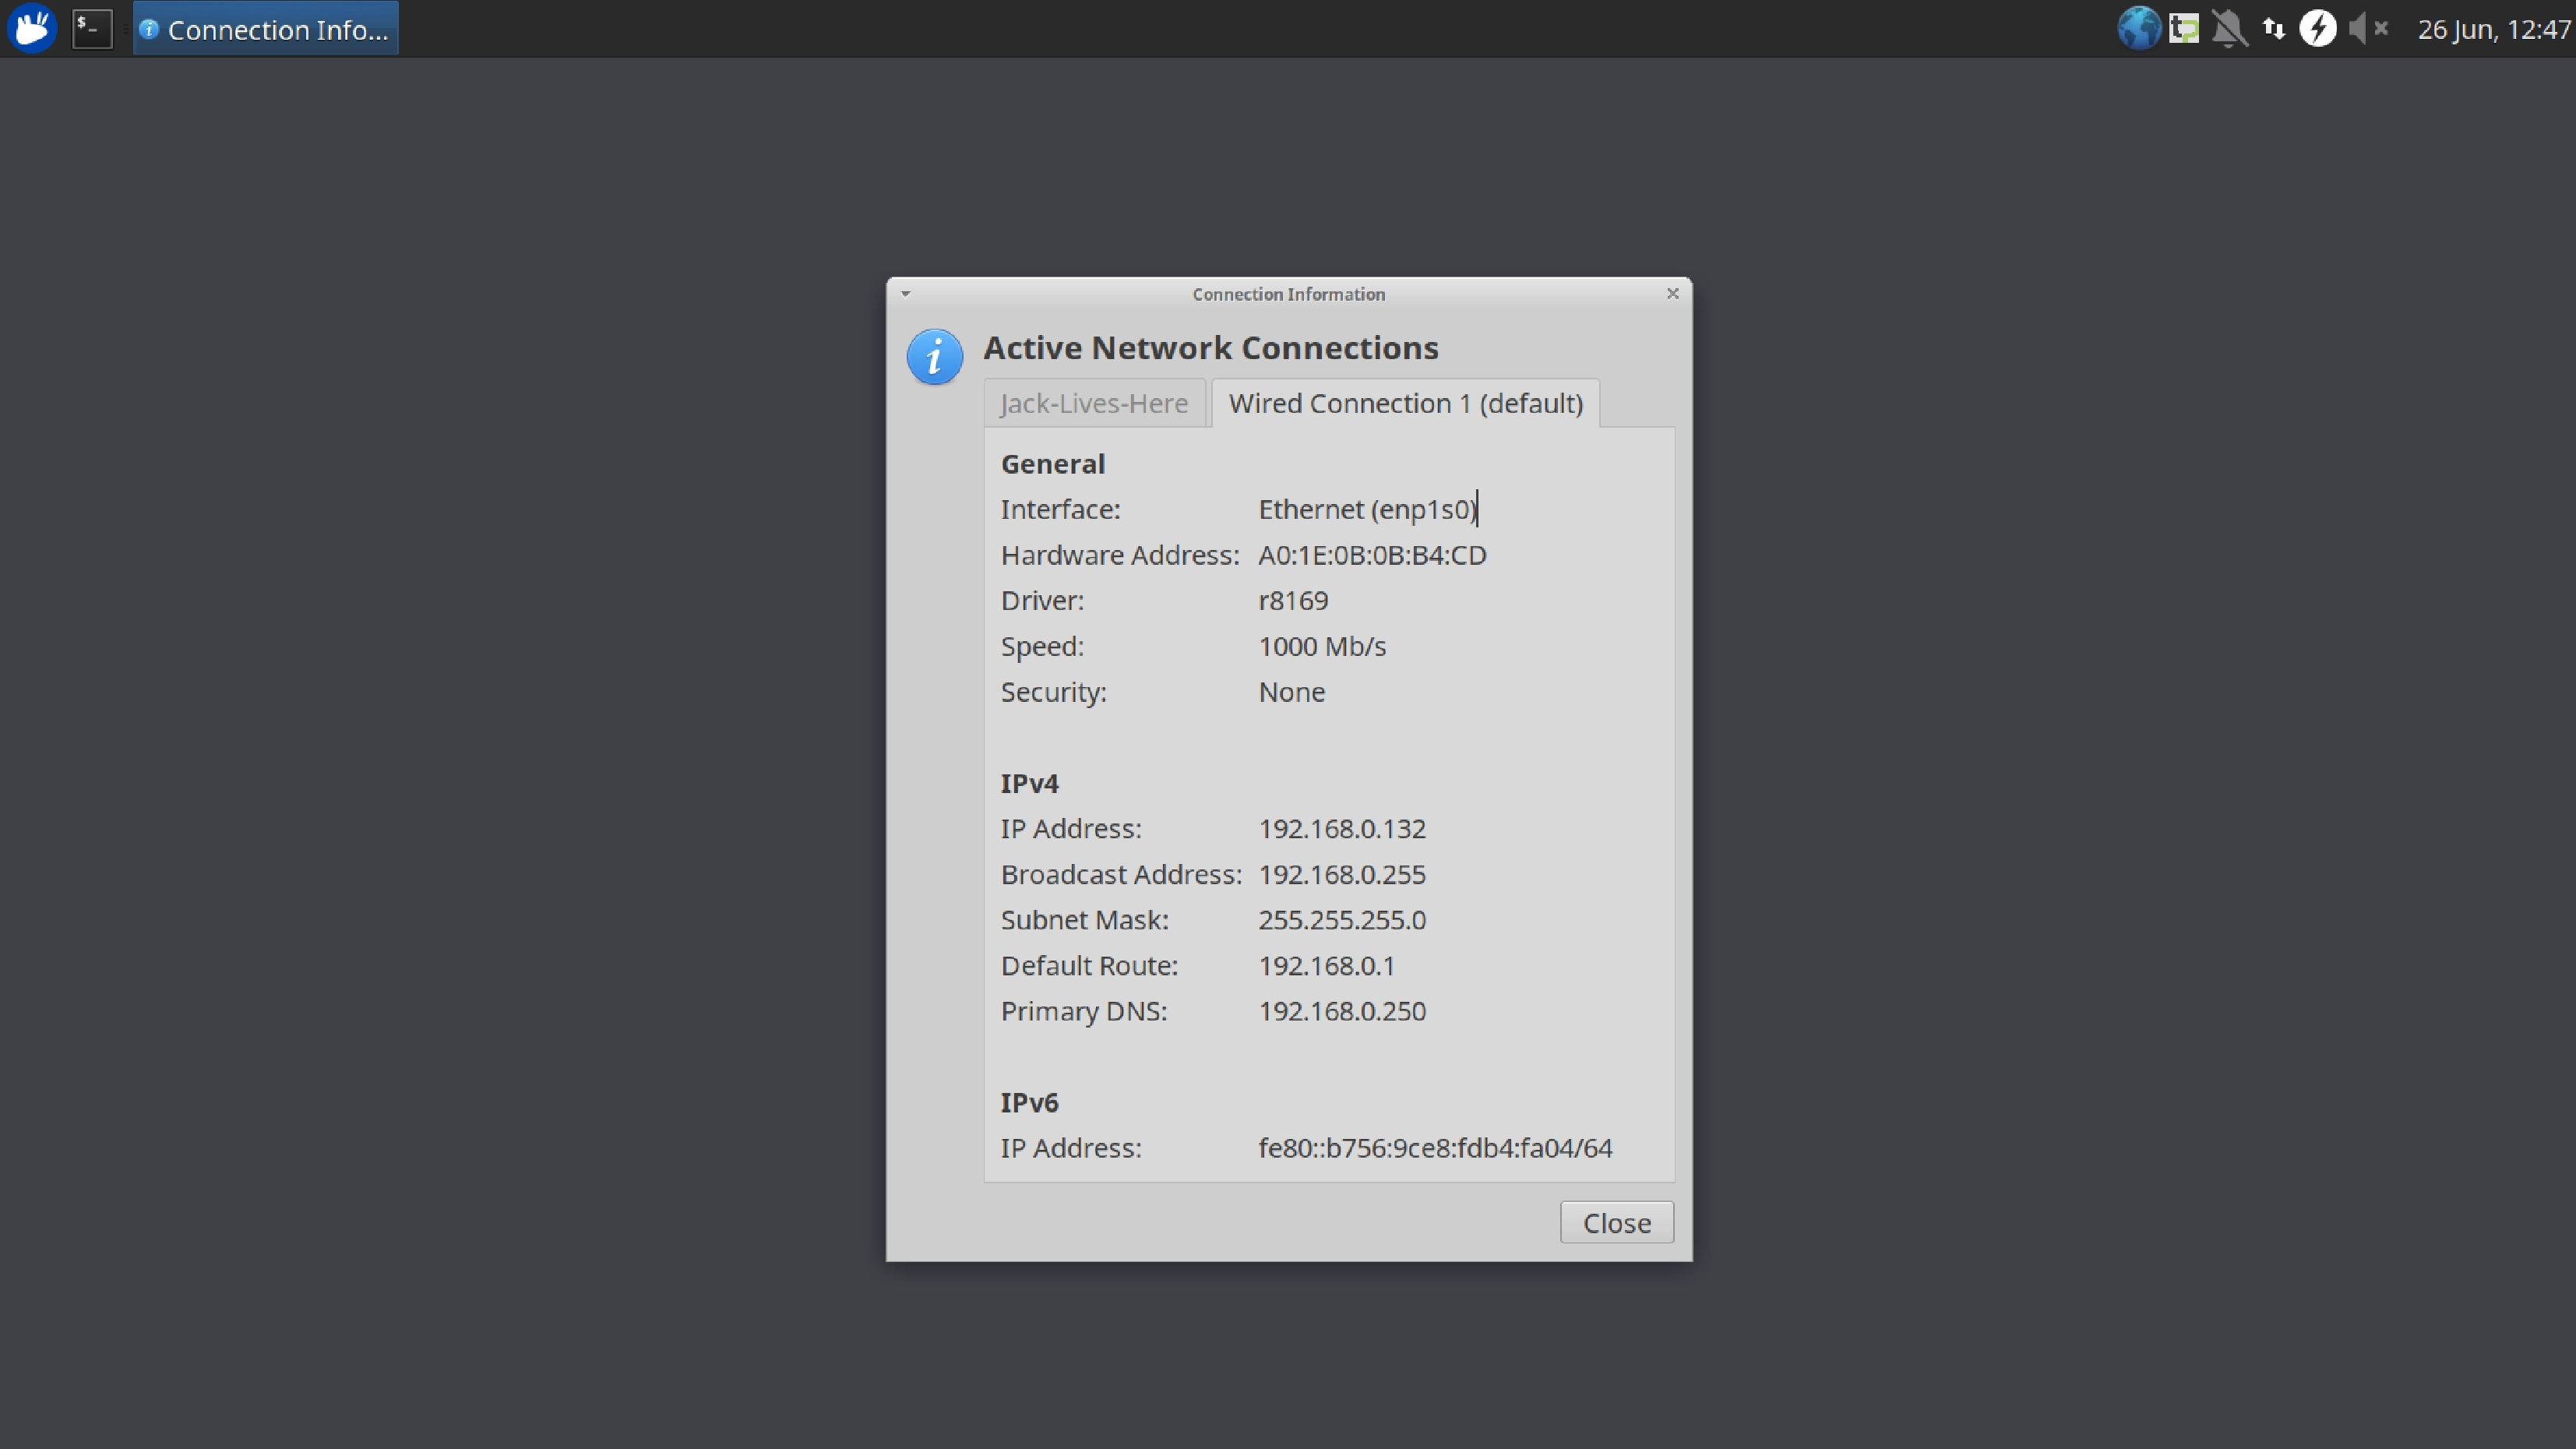
Your Mini PC should now have connected to the Internet.
After a successful connection, you can restart the client application. To do this, click on the highlighted icon as shown below:
 .
.
- The client application opens and displays the layout you configured:
- If a white page is still displayed, first try to trigger the reloading of the client application by pressing the
F5key. - If the blank page does not resolve, your Internet connection has not been established correctly via the previously selected LAN settings or is (temporarily) disrupted. Please check the previous steps or contact your local administrator in this case.
# Dynamic Host Configuration Protocol (DHCP)
- If your wired network is DHCP-capable, the Mini PC is automatically assigned a network address at startup.
- Provided there is an Internet connection, the application will open and display the layout you configured:
- If a white page is displayed instead, first try to trigger a reload by pressing the
F5key. - If this does not lead to the desired result, the internet connection is not established correctly or is (temporarily) disturbed. In this case, contact your local administrator.
Important notes:
- Under certain circumstances, the MAC address of the device must first be released by your local administrator in a Firewall, so that an address assignment via DHCP can take place.
- The MAC address is clearly visible on the back of our mini PCs.