# Contact persons
# General
In this article you will learn how to manage contact persons within your project. Contact persons are assigned to events, which will be displayed on your Tourist-Point. This shows your guests at a glance who to contact in case of questions. It also helps to give a face to your region or city and make contacts more personal.
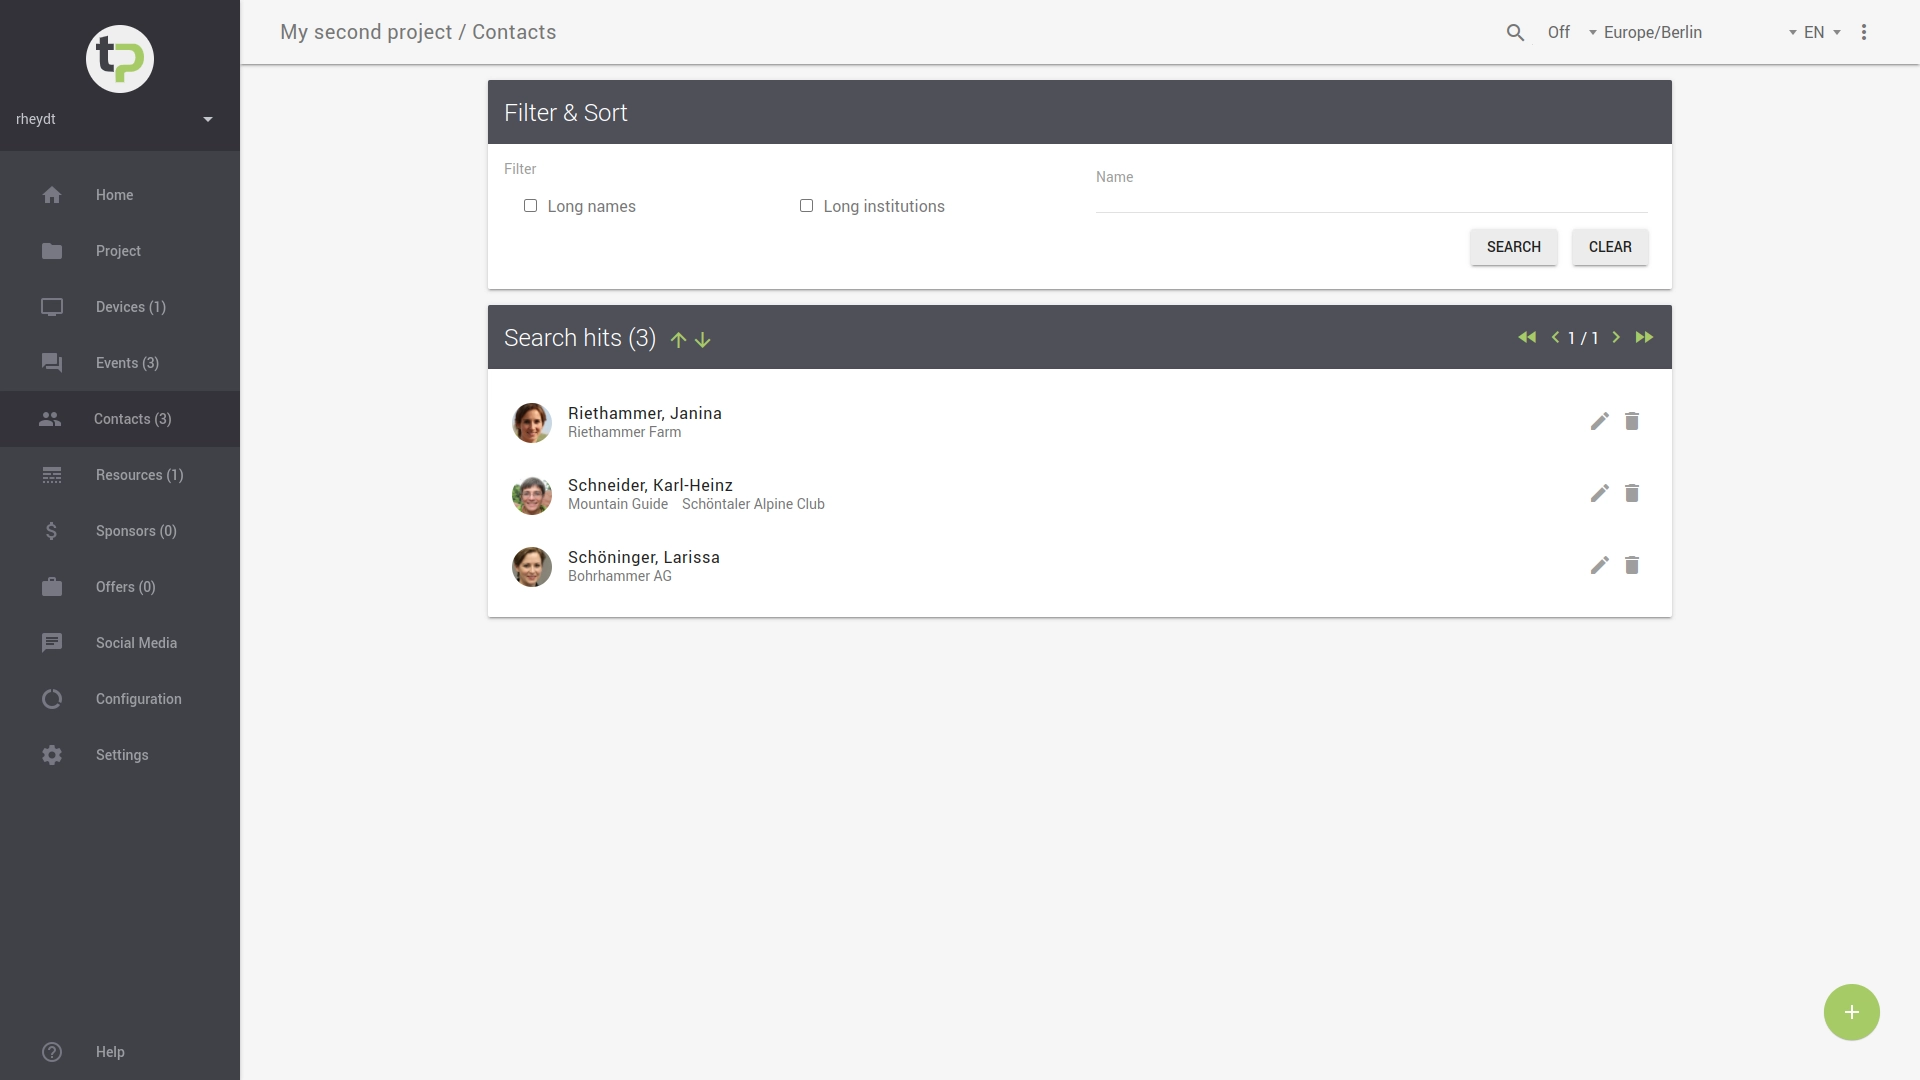
The overview (menu item: ) will first show you all the contact persons who are assigned to the current project.
You can search for persons in the search field, for this you can enter parts of the first or last name or also the name of the
department or institution to which the person belongs.
The search is not case sensitive.
To start the search process, press the SEARCH button.
Tip:
Additionally, you can filter the contacts by long names and institutions. Filtering can be helpful if you want to search specifically for people.
If you have discovered persons with several first or long (double) surnames on the display of the Tourist-Point,
you can narrow this down very quickly by selecting Long names.
This allows you to correct unwanted line breaks appropriately by shortening them.
This applies analogously to names of departments or institutions: Use the filter option Long institutions for this.
You can delete all filters or search entries with the button RESET.
This will display all entries again.
Contact persons are sorted alphabetically descending by their last name.
You can change the sort order using the up/down arrows.
Note that you can navigate through the hit list using the < or > icons,
to list more people under the given search criteria.
# Create contact person
You can add a new contact person by clicking on the + button in the bottom right corner.
A new view will open for entering the data:
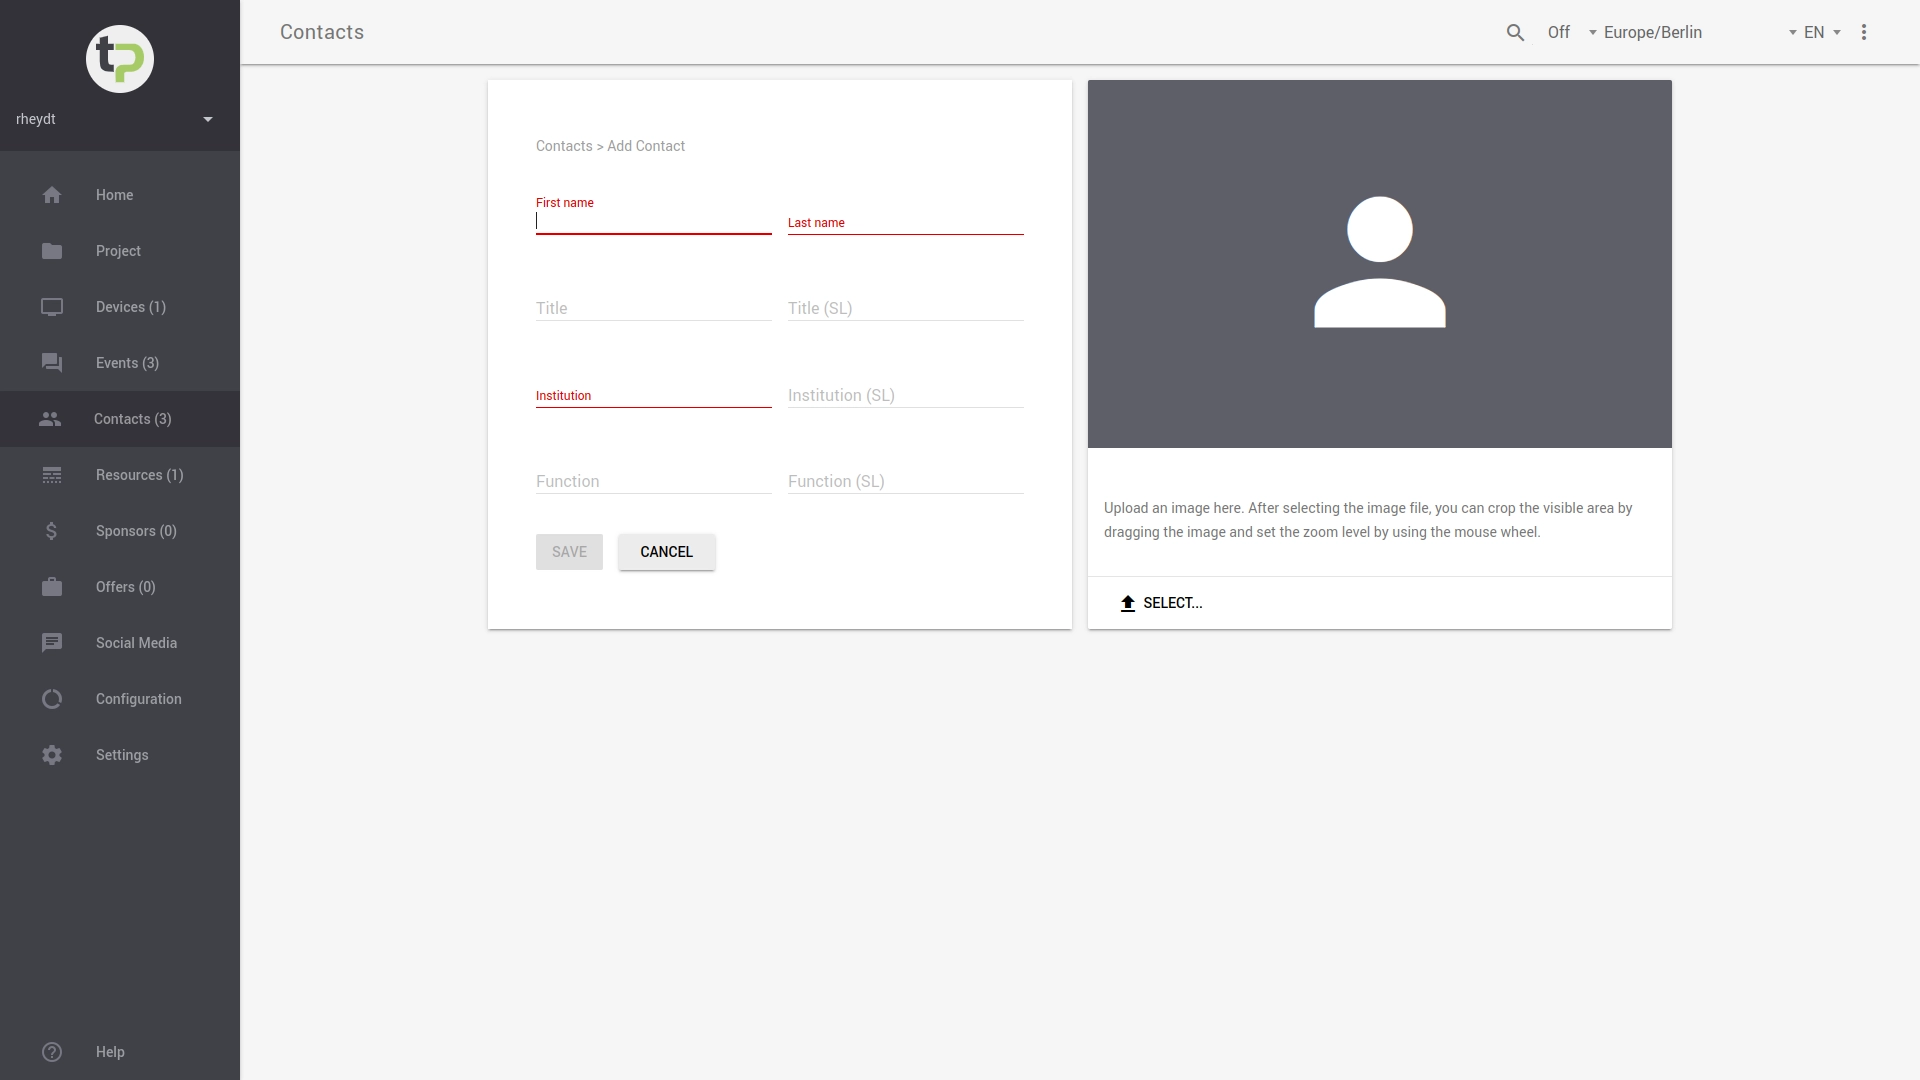
For each contact person you have to enter the first name, the last name and the institution. Optionally, you can also enter an (academic) title or a job title for the new contact person.
Tip:
If the title of the person, the institution or the function should not only be displayed in German, but also in a second language (SL),
for example English, you can enter this information under Title (SL) or Institution (SL).
# Assign profile picture
So that your guests are also presented with a picture of the person, you can use SELECT to additionally upload a picture stored on your local computer.
and assign it to the newly created contact person.
Attention:
The file size of the image must not exceed the default shown (in MB).
The dialog box that appears shows you all the files on your local device. Select an image or another media file of a supported format. This is then displayed in the current view via in the form of a preview.
Hints:
- Put the contact person in the best light by selecting a section that shows the person's head as in a profile shot. as in a profile shot.
- You can select the visible area by dragging the image.
- Use the mouse wheel to adjust the degree of magnification.
Use the STORE button to add the person to your project. Note:
The button becomes active only after all necessary entries have been made.
# Detail view & assigned events
You can view the details of a contact person by clicking on an entry in the overview.
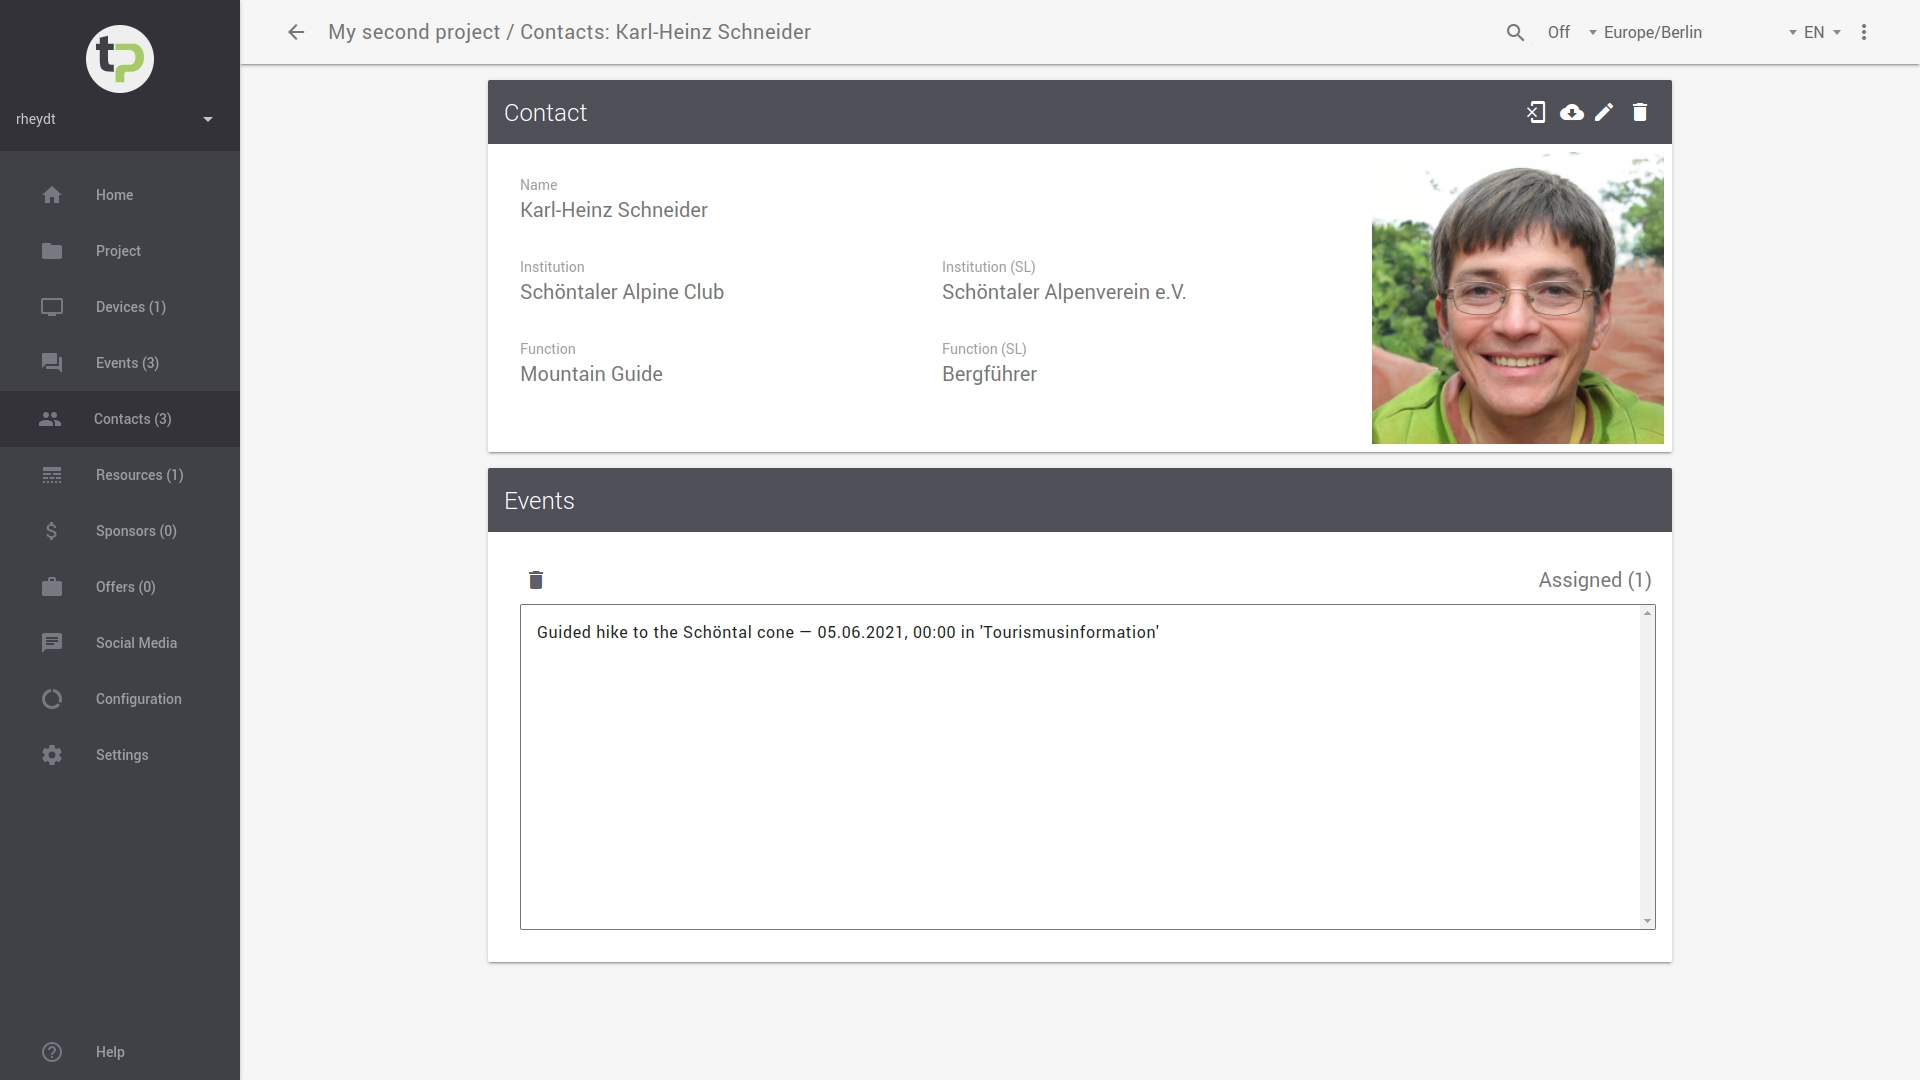
If events have already been assigned to the person, they will be displayed in this view. This way you can easily see which events a person has been assigned to. If desired, you can also remove the assignment to an event from this view with a click on to dissolve it.
# Change contact person
You can change all information about the contact person at any time. These changes will be active immediately and will also be updated on the Tourist-Point in a timely manner.
To adjust information about a contact person, you have two options:
- you can click on an entry in the overview.
- you select a person in the overview and get to the detail view via this. There is also a icon in the top right corner. This will take you to the change dialog.
# Assign or reset image
If you want to assign a new or different image to a contact person, this can be done via the detail view. You reach the detail view, by clicking in the overview of all contact persons on the symbol next to their name.
In the upper command bar you can use the left icon , to remove the link between the image and the contact person (see marking in the following image). You have to confirm this action via the dialog box that appears afterwards.
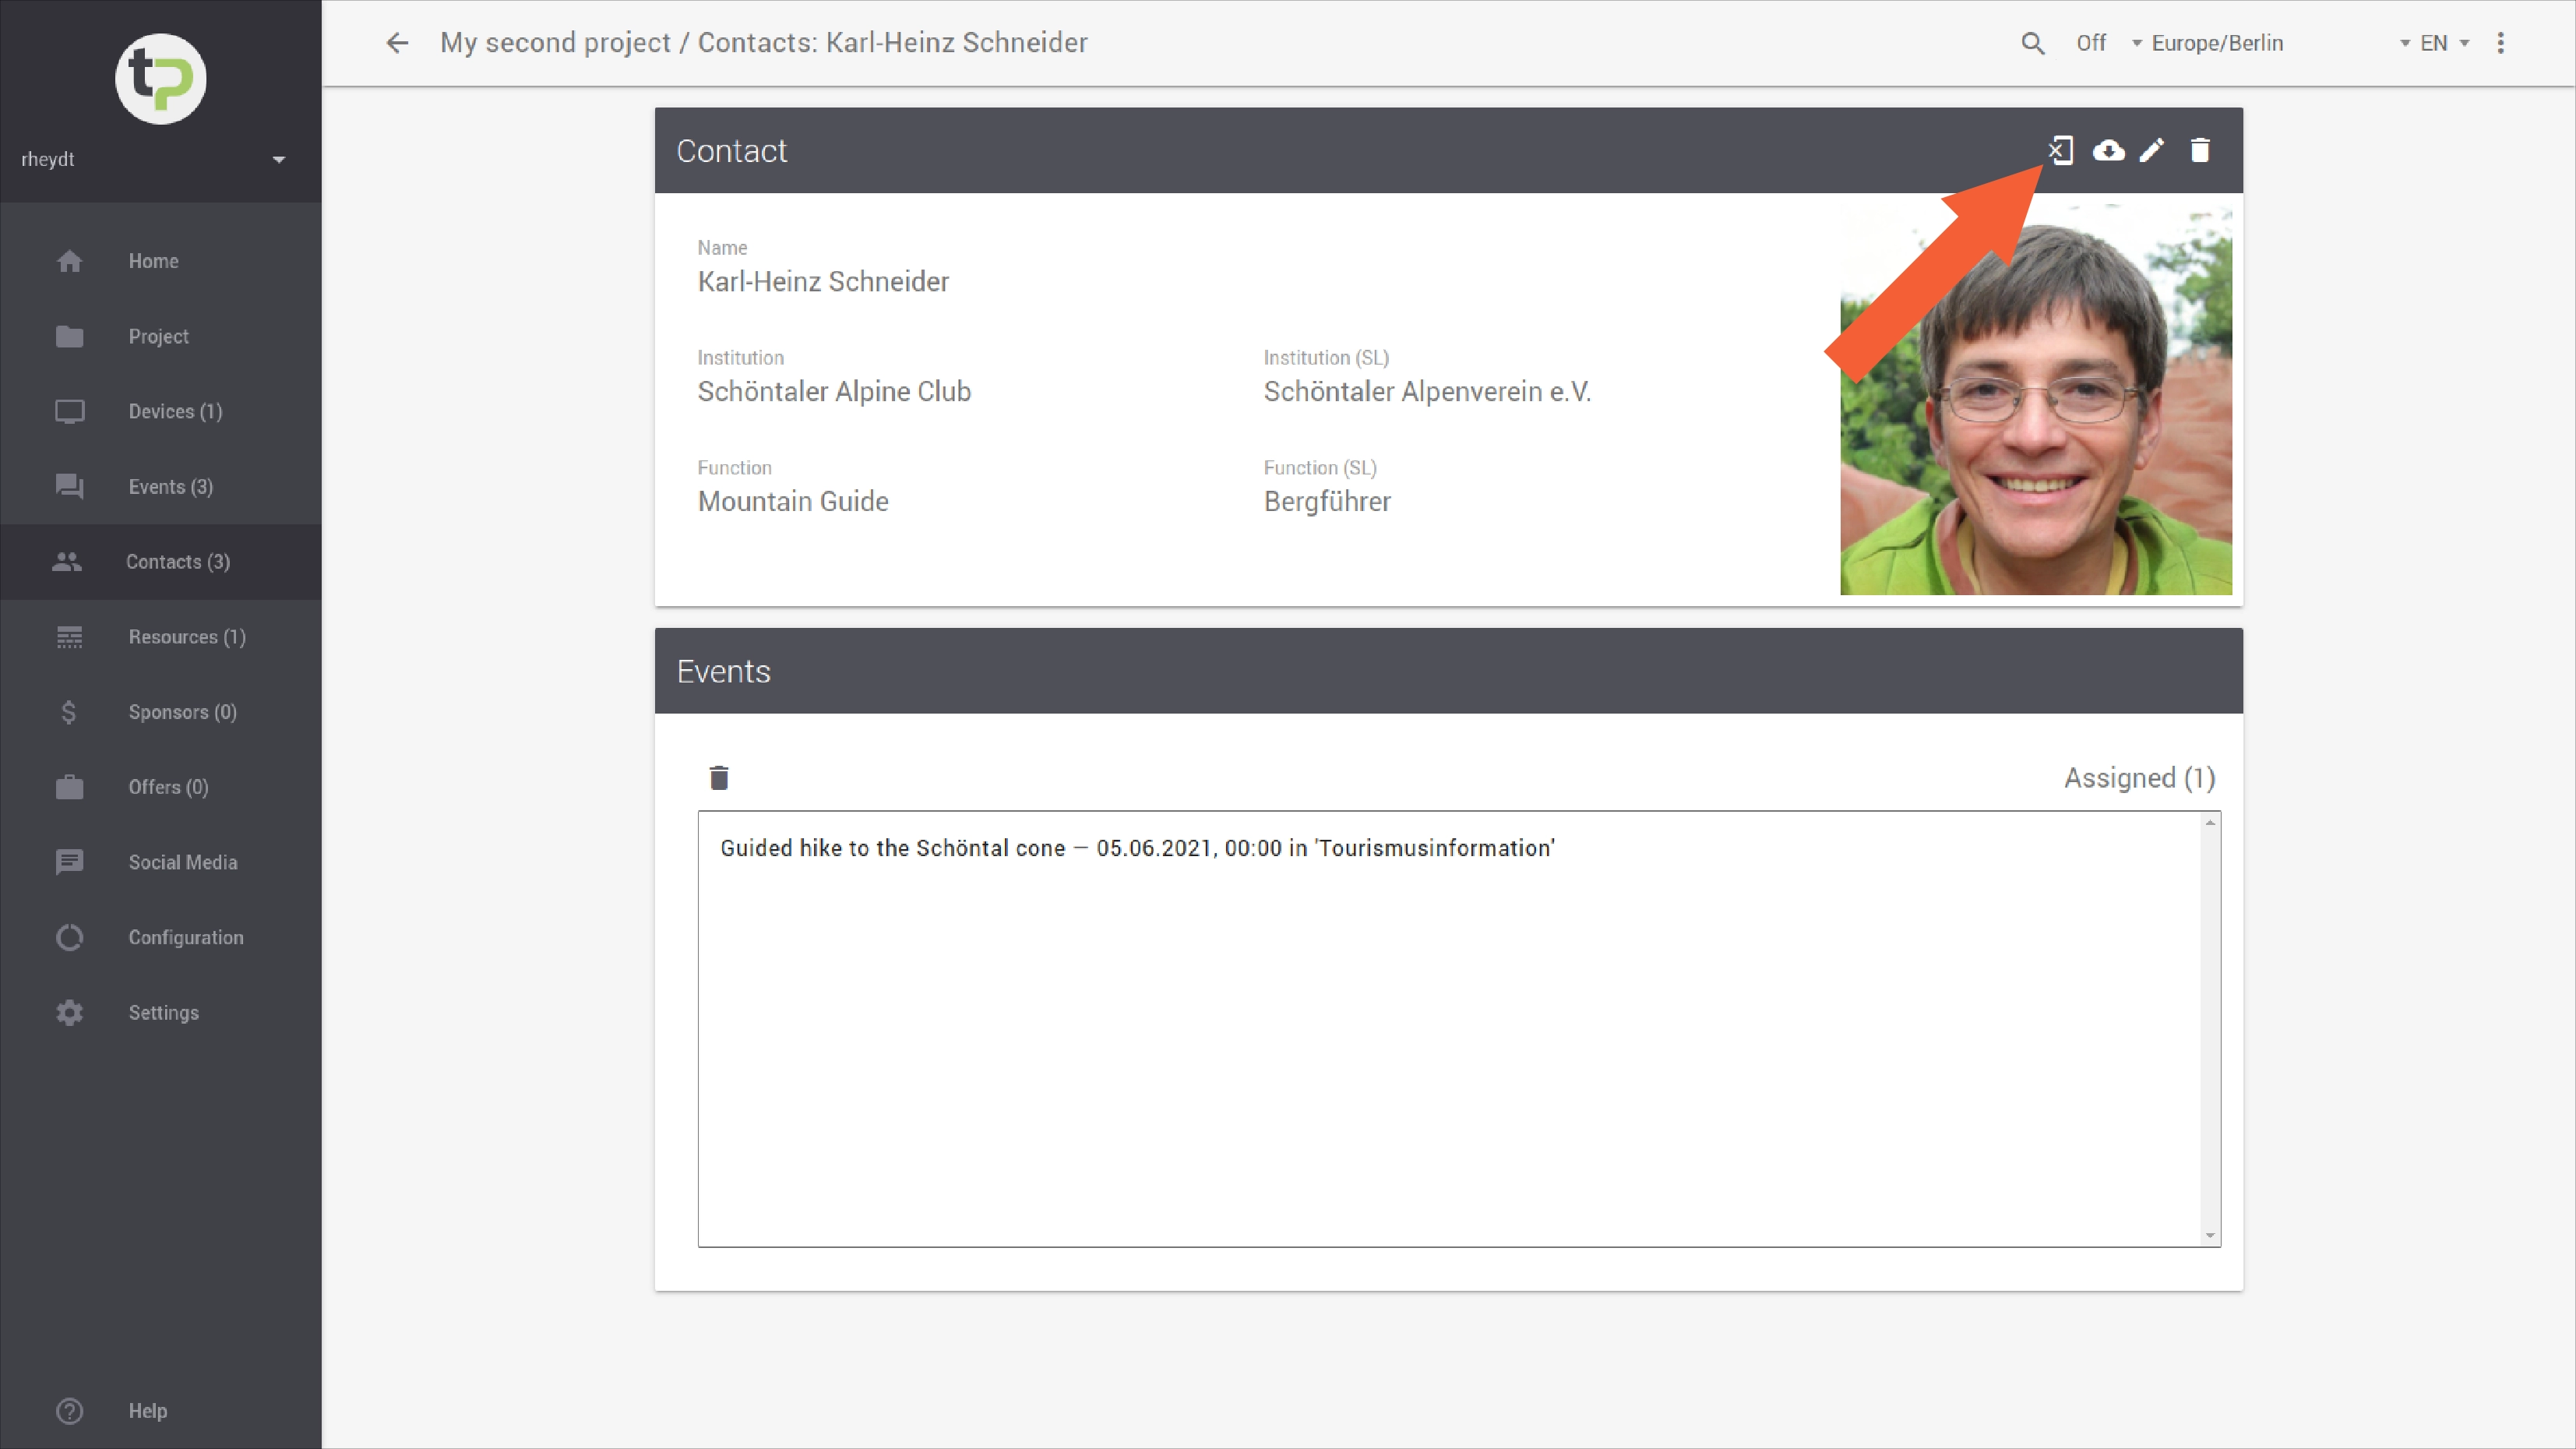
Afterwards you can select and upload a new image in the change dialog box (cf. create-contact-person).
By clicking on the button SELECT you can select and upload a new image on your computer.
Afterwards, do not forget to confirm the change with STORE.
# Delete contact person
Contact persons assigned to the project can be deleted in two ways:
- you can click on an entry in the overview.
Attention:
The person will be deleted immediately without any query from the system.
- you select a person in the overview and get over this into the detail view. Also there exists a icon in the upper right corner. After clicking on it, you will be asked if you really want to delete the contact person. You have to confirm this action via the dialog box that appears afterwards.